
Having trouble with the bosses in New Super Mario Bros 2, however unlikely that may seem? Well help is at hand, since here is how to beat all the game’s different boss battles including the Reznors and Koopalings.
Reznor
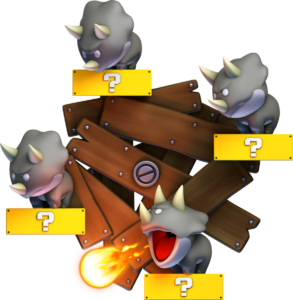
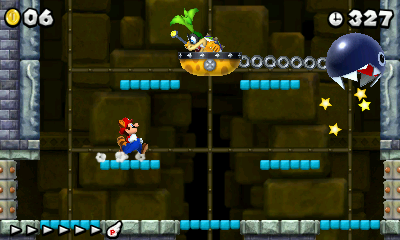
There are lots of different fights with Reznor in this game, and truth be told none of them are particularly challenging. What is Reznor you may be wondering? Well it’s two or four dinosaurs on a spinning wheel, a boss which first made an appearance in Super Mario World and hasn’t been seen for about twenty years. It was easy then, it’s even easier now.
Here’s how to beat each Reznor fight.
Battle 1
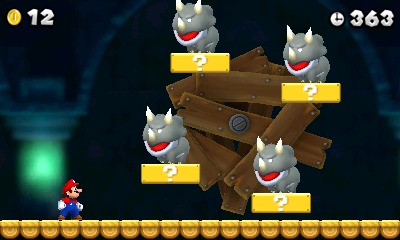
You have two Reznors on a spinning wheel. As you may have figured, this boss battle is extremely easy, just one hit to the block under each Reznor will defeat it instantly, and the Reznors themselves only very, very rarely bother to breathe fire at Mario. They can cause the bridge to start collapsing a while into the battle, but this will probably never become a concern due to how slowly the bridge falls apart and how quickly the boss can be defeated.
Battle 2
Now it’s four Reznors, like in Super Mario World. However, they’re still extremely slow, and rarely ever breathe fire at Mario hence making this battle about as easy as the first confrontation. Just hit the block under each Reznor to defeat it again, like last time.
Battle 3
Sort of like the last battle, with another four Reznors on a single wheel. However, this time they breathe fire much more regularly and only cause the bridge to start collapsing once two of them are defeated, just like how the battles worked in the Super Mario World days. Defeat them as you did in the last two encounters.
Battle 4
Two Reznor wheels side by side this time, except you start up at the top left corner and there’s no floor underneath any of the wheels. Oh, and each wheel has just two Reznors on it.
None the less, it’s a simple enough fight, and pretty much the exact same as the last few attack pattern and strategy wise.
Battle 5
Two spinning wheels next to each other, each with two Reznors on. You defeat them the same way, but they shoot fire less often and make the floor collapse after two of them are defeated. So in other words, standard Reznor fight except spread across two different Reznor wheels in the same room.
Battle 6
It’s the super Reznor wheel! Seriously though, this battle has a massive wheel with eight platforms on it, yet only four Reznors to defeat. Other than that, it’s exactly the same as the other fights.
Koopalings
The main world bosses in this game are the Koopalings, Bowser’s kids from Super Mario Bros 3, Super Mario World and New Super Mario Bros Wii. Generally speaking they attack kind of like how they did in the Wii game, with the exceptions of Roy, Morton and Ludwig, and all act roughly the same way in general.
Roy Koopa
As per usual, this first Koopaling is also one of the easiest in the game. It’s also a bit of a change for the series in general considering that Roy usually appeared at around the midway point of the first few Mario games he appeared in, yet he suddenly appeared as the first boss in this one.
His attack pattern is fairly complex for a Koopaling boss. First he ‘charges’ around at Mario for a while, getting knocked back and stunned for a short time when he hits the wall. You can jump on him at any time while he’s charging or stunned, so it’s no big deal, but at least Nintendo did put some effort into the battle.
After every hit, he dashes around while in his shell. You know how to dodge this, it’s been a standard boss attack in every 2D Mario game in history now and has even made its way into the 3D titles like Super Mario 3D Land, and spinoffs like the first Wario Land game. The walls also close in a bit after each hit, but you’re never particularly limited in terms of space.
He also likes to fire magic projectiles from the SMB 3 era magic wand he’s carrying for whatever reason, but these are incredibly easy to avoid and just open him up to being stomped on.
Three hits does in Roy, and that should take under a minute.
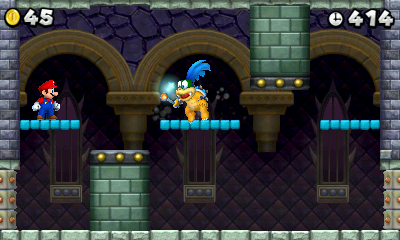
Iggy Koopa
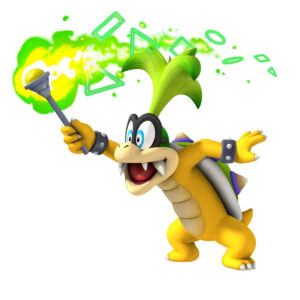
In a direct homage to his boss fight from New Super Mario Bros Wii, Iggy Koopa rides around in some kind of vehicle that’s pulled by a Chain Chomp.
Iggy’s boss battle in New Super Mario Bros 2
This is a rather interesting gimmick, although I do have to say it makes this fight one of the most annoying in the entire game since the Chomp’s movement is slow and unpredictable and Iggy actually fires magic at you while moving unlike the rest of his siblings.
But he can be defeated in much the same way as his relatives, just jump on his head three times. If the Chomp happens to go off screen, watch for where some sand is coming from, that’s the part of the room Iggy and co and reentering from. He’s annoying to fight, but another simple boss regardless.
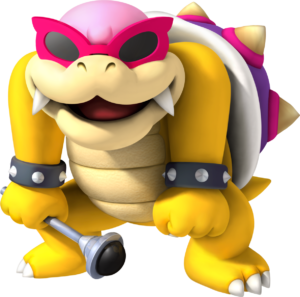
Wendy Koopa
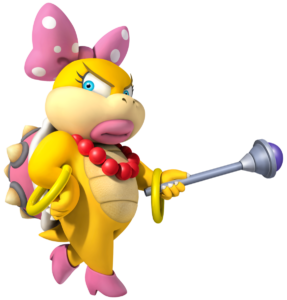
Like in New Super Mario Bros Wii, she’s the inevitable ‘underwater’ boss. Every now and then (like immediately once the battle begins) the room floods, and she summons some fish that’ll come in from the right of the screen.
Keep in mind you can’t jump on her when the room is flooded for whatever reason, so just avoid her jumping around and very rarely used magic attacks until the water drains away again, then stomp on her head as usual.

She’ll also go inside her shell and charge across the room after every hit, but it’s fairly simple to dodge given how flat and empty the boss room is.
You should be able to just about jump on her head all three times when the room is first drained without the water coming back, as long as you attack quickly. Do that, and she’s defeated like any of the others.
Morton Koopa
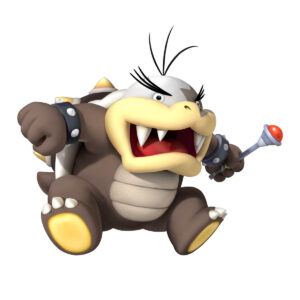
The easiest Koopaling in the game, Morton theoretically fires those large spike balls down a Donkey Kong style ‘course’ towards Mario. However, because you immediately start the battle right next to the guy and can jump on him the minute he comes down from the warp pipe, he usually never even gets a chance to attack.

He does go into his shell after each hit, but this still doesn’t do much because he doesn’t bounce off the walls or stay in his shell once he returns from going off the side of the screen. So you just jump as he falls from the pipe, stomp him again, repeat.
The Gold Flower makes him even worse, you don’t even have to move from where you’re standing to win.
You should have no trouble at all killing Morton before he even gets a proper attack in.
Ludwig von Koopa
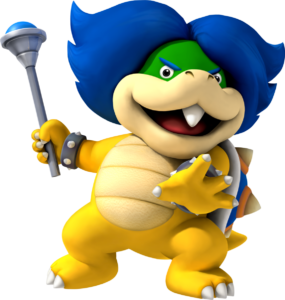
The final main Koopaling in the storyline, the eldest of Bowser’s sons uses the different chains in the room to hang from while shooting magic down at Mario.
How to beat him? Well as you got a demonstration of earlier, the cannon pipes can be used to defeat any enemies you fire yourself out of one at. So enter the pipe below where Ludwig is hanging, then watch as Mario is shot out and knocks Ludwig off the chain. Jump on him to deal damage, avoid him as he dashes around in his shell and repeat the pattern.

However, on the last hit things get a bit more interesting. Now he swings around the room on one of the chains, almost Tarzan style. Now, you are supposed to aim carefully and time your ‘blast’ to knock him down mid swing, but that’s annoying as heck to time properly and takes forever.
Instead, just wall jump (jump at a wall, then jump again when you hit to gain more height) on top of him as he passes by to damage him directly and ignore the whole cannon gimmick. Much easier, and ends the boss battle much more quickly.
Larry Koopa
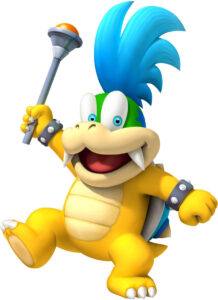
First ‘secret’ Koopaling boss in the game, he acts a bit like Morton from the Wii game complete with the columns randomly appearing from the floor and ceiling.
His fireballs also bounce off walls like the Podoboos from Super Mario World, but there’s only ever usually one of them on screen and hence they won’t be much of a problem for a skilled player.
But really, he fights like most other Koopalings, dies in three hits, charges around in his shell after every hit, you know the drill here. He’s not a challenge in any way whatsoever.
Lemmy Koopa
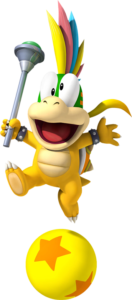
The final secret Koopaling, he fights just like he did in New Super Mario Bros Wii. How did he fight there you may wonder?
By riding around on a giant ball and shooting more balls from the magic wand he’s holding. These balls do no direct damage, just knocking Mario, yet are kind of dangerous with the bottomless pits and treadmill floor that make up the room.

To defeat him, just jump on him somewhat normally, then dodge his shell dashing attack like usual. Repeat to eventually win.
Also, if you need to change the treadmill direction for whatever reason, there’s a button to do that on the ceiling of the boss arena. However, my experiences with the battle show that it’s pretty much completely pointless to even try, since it’s perfectly possible (and fairly simple) to defeat him in the state the room is already in. But it’s there for anyone who wants the option.
Final Bosses
Two of these, for the first time in Mario game history. Normal Bowser is the final boss and is fought in world 6, Dry Bowser is the secret one and fought in Star World. Both attack identically.
Bowser
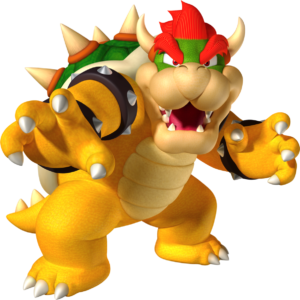
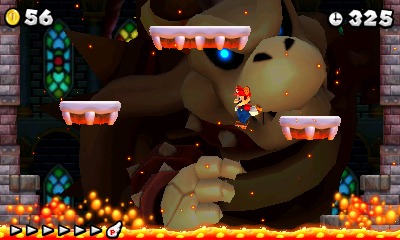
The primary villain and technical final boss of the game, Bowser is fought at the end of world 6 before the final credits sequence. Just like in most other games he’s appeared in since at least Super Mario World, he has two forms, and like in most recent titles, the first is another Bowser bridge battle.
The first phase of the battle is simply the same as the final battle from Super Mario Bros 1, Bowser moves a bit, jumps, throw hammers and breathes some easy to dodge fireballs. Just run under him and hit the switch.
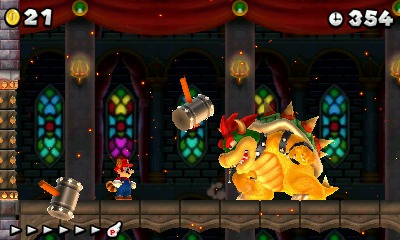
However, as anyone with the slightest sense of genre savvy may have figured out, the battle isn’t over. Peach is hauled upstairs, Mario climbs some platforms and the Koopalings cast magic on the (few hundred feet below the bridge) defeated Bowser to make him giant.
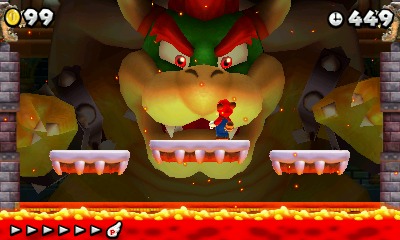
This fight however isn’t really that hard. Basically, Bowser’s chasing Mario up a tall tower, and you just have to stay on the various moving platforms while avoiding the ocassional fireball from a statue or Bowser striking at/destroying the platforms you’re on. It’s all generally quite easy since his attacks are telegraphed so blatantly as to be ridiculous (a good five seconds before they hit), and the Raccoon Leaf basically destroys the whole thing.
At every ‘floor’, the lava will stop rising for a brief moment as Bowser sets the floor on fire. He always moves from one side to the other while doing this, and it’s blatantly obvious where he’s aiming at any one time, so it should give you too much trouble.
Just avoid his slow strikes and ride the moving platforms up til you hit a switch, then watch as Bowser fails and the ending plays out.
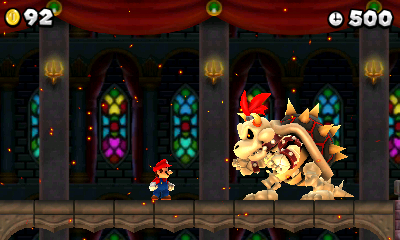
Dry Bowser

Exactly the same as normal Bowser, except three things:
He’s a skeleton
He throws bones rather than hammers (same pattern/thrown in same arc)
His fireballs are blue/purple rather than red/orange
Basically, do exactly what you did to beat Bowser.
Other Boss Strategies
As well as jumping on boss heads or hitting them off platforms from below, the bosses in New Super Mario Bros 2 can also be defeated by hitting them with either a normal or gold fireball.
Use the Gold Flower
This power up not only does the equivalent of one jump hit for every fireball, but gives you twenty coins every time you hit a boss with a gold fireball. And with the Reznor battles taking place with the bosses resting on coin blocks, this lets you easily kill multiple creatures in one hit.
Fireballs work on most bosses
Except Dry Bowser. Yes, this does include Reznor, despite fireballs being completely ineffective against him in Super Mario World.
However, with the exception of the underwater battle against Wendy, fireballs are arguably completely pointless in boss battles simply because you can kill them quicker with other methods. This is especially notable with the Reznor fights, since a single Reznor takes only one normal hit to defeat, yet can withstand at least ten fireball shots before finally going down.
2 Comments
Let’s hope this channel gets warned. Don’t forget to check out the article for any typos. Let me know in the comments when you fix it. Shame for making a typo! Don’t forget to notice and fix!
Finally Bowser throws hammers again. Some people think he abandoned this attack.