
Let’s face it, Mario & Luigi Dream Team is much harder than any of the previous games in the series. And part of this is because the bosses in Dream Team are far more difficult to kill than those found earlier, with clever weaknesses, difficult to dodge attacks that change as the battle goes on and various other neat tricks.
But now you don’t have to suffer the boss battles alone! Yep, I’ve written a nice boss guide for this game that not only covers how to dodge every single boss attack in the entire adventure, but also how to do maximum damage yourself, find out what the bosses drop as items or even how to cheese the later battles with clever badge effect based strategies!
So suffer no more Dream Team fans, here’s the very first boss guide for the game in existence to help you through the adventure!
Normal Bosses
Antamasa (battle 1)
| Boss Info | |
|---|---|
| Antasma (Battle 1) | |
 |
|
| Location: | Intro Scene |
| HP: | 6 |
| Power: | 0 |
| Defence: | 0 |
| Speed: | 0 |
| Experience: | 0 |
| Coins: | 0 |
| Items: | None |
| Gear: | None |
Well, this isn’t really much of a boss to be honest. Indeed, while Antasma does indeed look quite menacing in this early battle on the blimp to Pi’illo Island, he literally cannot do a single point of damage to Mario in any way whatsoever, and he goes down in about four hits.
Do what you like. You can easily dodge his one ‘attack’ (the one with the bats), but it’s basically irrelevant given how he’s entirely incapable of harming Mario at this stage.
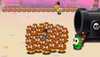
Smouldergeist
| Boss Info | |
|---|---|
| Smoldergeist | |
 |
|
| Location: | Pi’illo Castle |
| HP: | 12 |
| Power: | 34 |
| Defence: | 30 |
| Speed: | ? |
| Experience: | 5 |
| Coins: | 10 |
| Items: | None |
| Gear: | Cozy Wear (20% chance) |
Your first ‘real’ boss encounter in the game, this one is unlikely to kill you unless you’re either playing Hard mode or are absolutely terrible at combat. Basically, the boss is made of four Spirit Ball like flame creatures, and to make them vulnerable to attack, you have to dodge their attacks.
So how do you do this? Well basically, they’ve three attacks; one in their ‘flame’ form and one in the normal form. When they’re alight, they’ll either shoot a fireball at one of the bros (who has to jump over it), or go up to them and shoot a ring of fire. The former can be dodged by looking at where their eyes are pointing and making that respective character jump, the latter by looking at what height the ring is shot at (if low, jump, it high do nothing).
When they’re out on the other hand, they’ll just roll towards either Mario or Luigi. Just jump on them to do damage and counter this attack.
And with that said, you may be wondering how you actually attack these things. Well, there are three ways to put them out and make them vulnerable to attack. Namely:
- Jumping on them, which supposedly harms both Mario/Luigi and puts out the boss at the same time.
- Dodging their flame attacks, which puts them out after a perfect dodge with no damage
- Making sure they can’t relight by jumping on each of them in order and avoiding their rolling attacks after the statue itself blows out the flames.
Either way, after a short while Smouldergeist will be defeated and you can progress on with the story. And no, you never end up fighting these things ever again, even in the Battle Ring.
Dreamy Mario
| Boss Info | |
|---|---|
| Dreamy Mario | |
 |
|
| Location: | Dreamy Pi’illo Castle |
| HP: | 96 |
| Power: | 30 |
| Defence: | 30 |
| Speed: | 19 |
| Experience: | 75 |
| Coins: | 45 |
| Items: | None |
| Gear: | So-so Boots (100% chance) |
Ah yes. The inevitable ‘Mario doppleganger’. We already had one of these in the last game (see, Bowser’s Memory ML) and such enemies have always been a part of Nintendo’s titles in general (Dark Link, Dark Samus, etc), so it was kind of obvious we were going to get one in Dream Team at some point.
This time though (interestingly enough), the ‘clone’ enemy is only the first dream boss in the game, and our first opponent to use our dream world abilities on. Think of it like a warmup boss for learning how dream world combat works, like how Smouldergeist was our first taste of ‘real world’ battling against an actually dangerous foe.
The battle does have an interesting ‘gimmick’ however. You see, as you likely noticed when fighting normal enemies, dream world battles are almost always against large groups of enemies rather than solitary individuals. And Dreamy Mario takes advantage of this by generating a ton of clones every turn and hiding between them. This means Mario has to watch his movements and attack the real one to do any damage, which can be a bit more difficult than you may expect.
As far as his attacks go though, they’re mostly pretty simple to dodge. His main one has him and his clones charge at Mario, who has to avoid them by jumping on/over them as they approach. However, if Mario hits a clone, it also flies into the air, forcing him to then dodge the falling clones at the end of the battle. So try and jump over the fake Dreamy Mario copies, and then try and jump directly on the actual boss.
In addition to this, Antasma himself can also interrupt with some attacks. One of these has him shoot a mix of fireballs and coins towards Mario, who has to move around and dodge the attacks. It’s really easy to avoid damage in this situation, so just use the circle pad to move around and stay out of the way of Antasma’s attacks.
Another thing that can happen is Antasma charge into the background, with Mario giving chase. Here, you need to jump over the invincible Dreamy Mario copies as they run at Mario, so do that until the attack ends.
So that’s how to dodge Dreamy Mario’s attacks. As for how to beat him quickly… well, you don’t have a whole lot of choice to be honest. I mean, you don’t have any Luiginary Attacks yet, you can’t use a hammer and can’t do pretty much anything other than jump on him, so what’s there to recommend? Just jump on the real Dreamy Mario, avoid the clones and avoid his attacks well enough that the battle ends quite quickly.
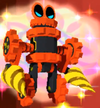
Grobot
| Boss Info | |
|---|---|
| Grobot | |
 |
|
| Location: | Mushrise Park |
| HP: | 288, 1133 (Grobot X) |
| Power: | 58 |
| Defence: | 54 |
| Speed: | 26 |
| Experience: | 250 |
| Coins: | 75 |
| Items: | None |
| Gear: | So-so Hammer (100% chance) |
Did you really expect this area to end without a boss battle of some sort? Hope not, because this game has a nice tendency to put them at the end of every major section in the game. After watching poor Brickle get horribly beaten up by his malfunctioning robot creation, it begins! Time to take down Grobot!
Attack wise, Grobot is a fairly simple boss, having just three easy to avoid attacks. The first one has him aim at either Mario or Luigi and shoot a ball of water at them. If it’s shot low, jump, if it’s shot high, stand still and let it soar overhead.
It’ll also charge off screen and then come racing back towards either Mario or Luigi, you can deflect this by using the targeted bro’s hammer.
Finally, the boss will sometimes chase Mario and Luigi down the screen while shooting water at them. Jump the projectile hits, and if at least one brother is left standing at the end of the chase, it’ll hit a rock and take damage before the battle resumes.
But with that said, I’m sure you want to know what attacks to use on the boss to make it go down quicker. Answer? Bros Attacks. Just use the Red and Green Shell attacks every turn and you’ll take away a good quarter or so of its total HP per turn. It won’t take too long to go down after that, and to be honest, you shouldn’t really have any trouble with this thing at all.
Bowser/Antasma (battle 2)
| Boss Info | |
|---|---|
| Bowser and Antasma | |
 |
|
| Location: | Dream’s Deep |
| HP: | 233 (Bowser), 6 (Antasma), 771 (Bowser X), 19 (Antasma Bat X) |
| Power: | 70 (173 in Battle Ring) |
| Defence: | 56 (135 in Battle Ring) |
| Speed: | 23 (135 in Battle Ring) |
| Experience: | 300 |
| Coins: | 0 |
| Items: | Syrup Jar (3% chance after Antasma bat defeat) |
| Gear: | Iron Ball Hammer (100% chance) |
Hey, it’s the other boss from the demo! Yes, you have to battle both Bowser and Antasma as a team to get through Dream’s Deep and progress with the story, and it’s quite the impressive battle.
First thing you need know is simple; Antasma splits into a bunch of bats, and these surround Bowser. If you don’t take them out, they’ll then charge you in an attack later. So you want to hit the group with a Luiginary Ball whenever possible.
As for attacks, Bowser has quite a few powerful ones. For starters, he can punch Mario like in Bowser’s Inside Story, with the additional twist that he actually turns intangible, ducks behind him and hits him from behind. So pay attention to Bowser’s movements here, and strike back with your hammer when he turns solid again.
Bowser can also chase Mario down the screen, where he then has to dodge Bowser by jumping the fireballs. This attack… is actually easier than it looks, if you do one thing correctly.
Namely, you don’t keep turning and moving around. Really, the more you turn, the more you slow down and the more of a chance Bowser has of catching up. You also obviously want to avoid landing on the flames at all costs, so go as straight as possible and jump them when you can to avoid this attack.
He can also breathe fire and send shockwaves at Mario. To dodge these, you want to stand still and jump the shockwaves, then lure Bowser to the back or front of the screen and move out the way before he breathes fire. Once that’s done, just jump the fire breath as it moves across the battlefield, and you should be fine.
So yeah, just follow those tips to avoid his attacks, take out the Antasma bats whenever you can with Luiginary Ball and you should be fine in this fight. It’s not really as bad as some people online make it out to be, and to be honest, Bowser actually has less health than Grobot here.
Torkscrew
| Boss Info | |
|---|---|
| Torkscrew | |
 |
|
| Location: | Dozing Sands |
| HP: | 656 (normal), 1594 (Torkscrew X) |
| Power: | 101, 234 (Torkscrew X) |
| Defence: | 97, 224 (Torkscrew X) |
| Speed: | 34, 60 (Torkscrew X) |
| Experience: | 500 |
| Coins: | 260 |
| Items: | None |
| Gear: | Coin Boots (100% chance) |
Well, you didn’t honestly think you were just going to get rid of him after a mini game and without a fight, right? Still, Torkscrew is generally not that difficult a boss in my opinion. Here’s how to beat him.
First of all, note that you cannot jump on his head at the start of the battle (or when he’s standing upright in general) because of the drill horn he has. So avoid Jump attacks at the start, and avoid Bye Bye Cannon, Star Rocket and Dropchopper when you’re refighting him in the Battle Ring.
However, the very first attack he’ll likely use provides a way round this, with him leaping in the air and coming down on Mario or Luigi’s head. Hammer him away, and he’ll fall on his back, becoming weak to jump attacks.
Torkscrew also has a couple of other attacks he’ll use. One is burrowing underneath a certain Mario brother and drilling upwards, which you have to jump with good timing to avoid. If you land on him at this point, Mario/Luigi will end up riding his horn and the other one will have to chase him down into the background as well.
He also chases a Mario bro into the distance, and then charges them from the left or ride side. It’s quite clever really, how the character in the background has to dodge his charges at the same time as the one in the foreground has to dodge things like incoming fish and desert enemies from all sides (meaning you have to pay attention to two different scenes at once).
Really though, Torkscrew isn’t a difficult boss. His attacks are mostly quite weak and easy to counter or dodge, and you can very easily wear him down with your typical Bros Attacks like the Green Shell or Fire Flower. Just do what I mention above and keep attacking and you’ll win.
Big Massif’s Apprentices/Followers
Four mini bosses you have to fight in the ‘Beef Off’ to start the battle against Big Massif in Dreamy Wakeport, here’s how you defeat each of them.
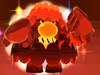
Sorrow Fist
| Boss Info | |
|---|---|
| Sorrow Fist | |
| Location: | Dreamy Wakeport |
| HP: | 395 |
| Power: | 139 |
| Defence: | 75 |
| Speed: | 115 |
| Experience: | 200 |
| Coins: | 50 |
| Items: | Super Candy (30% chance) |
| Gear: | HP Knockout Bangle (5% chance) |
Big Massif’s first… minion I guess, Sorrow Fist is an extremely unconfident character who actually doesn’t want to fight to begin with. Still, thanks to Luigi giving him words of encouragement (why do you encourage someone you need to beat up?), he ends up fighting you like the other Hooraws.
This time though, you have to win with Excellent Hits only. So in other words, if any attack fails to get Excellent, then the damage is null and is removed. As a result of this, I’d recommend using Luiginary Ball only here, since you can easily tell whether you’ve got an Excellent rating before the attack is even over (based on if you see three green flashes as the ball rolls towards the enemy) and it’s very easy to get an Excellent rating with in general.
Attack wise, he has a few attacks. These attacks are also shared with every single other Hooraw boss except Beef Cloud, so you may want to remember this strategy afterwards.
First up, he charges Mario. To dodge this, just jump over him when he approaches, since he goes slow enough (and with such a pathetic running stance) that he’s nowhere near as hard to dodge as any of the others Hooraws or Big Massif.
He can also drop a oyster shell and punch that towards Mario. Deflect it back with the hammer.
Just avoid those two attacks, use only Excellent attacks back (aka non stop Luiginary Ball), and you’ll win easily and get the first Hooraw medal.
Beef Cloud
| Boss Info | |
|---|---|
| Beef Cloud | |
 |
|
| Location: | Dreamy Wakeport |
| HP: | 357 |
| Power: | 1 |
| Defence: | 105 |
| Speed: | 1 |
| Experience: | 200 |
| Coins: | 50 |
| Items: | Super Candy (30% chance) |
| Gear: | HP Knockout Bangle (5% chance) |
This is… different to your normal enemy/boss encounter. See, Beef Cloud doesn’t actually ever attack you in battle. Instead, he literally just sleeps through the entire fight, healing by a significant amount every few seconds or so.
Hence your goal here is fairly simple; hit him quickly enough that you drain his HP faster than he himself raises it by healing.
Don’t use Luiginary Attacks. Yes they do lots of damage, but they’re also so damn slow that he’ll have healed about his health by the time you actually deal any damage of your own. Instead, just repeatedly use your jump and hammer attacks non stop, ignore the referee when he asks if you want to stop the battle and keep going until Beef Cloud is finally defeated.
Heavy Zest
| Boss Info | |
|---|---|
| Heavy Zest | |
| Location: | Dreamy Wakeport |
| HP: | 282 |
| Power: | 112 |
| Defence: | 80 |
| Speed: | 60 |
| Experience: | 200 |
| Coins: | 50 |
| Items: | Super Candy (30% chance) |
| Gear: | HP Knockout Bangle (5% chance) |
Yes, it’s battle number three, with two Hooraw medals down! This time, you have to win within three turns! So you know what this means… non stop Luiginary Attacks!
As for his own attacks, his basic one is the same as Sorrow Fist’s, with him charging at Mario and you have to either jump or on his head to dodge or counter respectively. Nothing more to be said about this.
However, he also charges at you at full speed, with a Hermit Crab carring a large rock to the left at the same time. Here, you have to either move out the way or jump over him to avoid taking damage, which isn’t too difficult. It’s basically practice for when Big Massif himself does the exact same move later on.
And that’s about it. No punching objects towards Mario here, so no need to watch out for that.
So yeah, as said, just pound him with Luiginary Attacks over and over again. He’ll go down soon enough.
Thunder Sass
| Boss Info | |
|---|---|
| Thunder Sass | |
| Location: | Dreamy Wakeport |
| HP: | 140 |
| Power: | 176 |
| Defence: | 53 |
| Speed: | 138 |
| Experience: | 200 |
| Coins: | 50 |
| Items: | Super Candy (30% chance) |
| Gear: | HP Knockout Bangle (5% chance) |
Finally, it’s Thunder Sass! Unfortunately for you, this ‘twist’ is an annoying one. Yes, you have to win while only using counter attacks! No attacks of your own, no badge effects, no gimmicks. So in other words, better get used to countering his attacks, otherwise you physically cannot win this fight.
Attack wise, he’s got a mix of attacks taken from the other Hooraw fights and a new one. For the old one, he charges at you at full speed. And I mean, very, very fast. Better jump as quickly as possible, because he goes about 90 miles per hour here.
His new attack on the other hand is to summon three groups of Hooraws, and then bounce off them into Mario. He’ll only bounce off the ones with their arms pointed upwards, so deflect him with the hammer when he flies into Mario to counter this move.
There’s not to advise here. Counter all his attacks, heal in your own turns… and that’s about all you can do. Maybe if you’re lucky you can find/buy Retribution Wear from somewhere, since that deflects damage enemies do to you and causes the enemy to get hit for an equal amount. So I guess in theory you could equip that, stand still, watch him get struck by lightning after he hits you and then just heal up every few turns. But I’m not sure, no one’s written down where you get this gear from yet.
Big Massif
| Boss Info | |
|---|---|
| Big Massif | |
 |
|
| Location: | Dreamy Wakeport |
| HP: | 864 (Big Massif), 28 (Hooraw), 1901 (Big Massif X), 53 (Hooraw X) |
| Power: | 140, 291 (Big Massif X) |
| Defence: | 103, 226 (Big Massif X) |
| Speed: | 61, 104 (Big Massif X) |
| Experience: | 800 |
| Coins: | 250 |
| Items: | None |
| Gear: | Knockout Boots (100% chance) |
Now his followers are all defeated, it’s time to take on Big Massif himself. And do you know what?
This is arguably the first boss battle in the game in which you’re likely to screw up or perhaps even lose. I mean, Antasma and Bowser were a little annoying as a team, but most of the other battles you’ve fought have generally been against foes whose attacks are incredibly simple to avoid and who tend to go down fairly quickly. Big Massif on the other hand? Not one of these easy opponents.
Here’s how to avoid his attacks and win…
First up, he’s got a charge attack where he runs at Mario from off screen. It’s very fast, so dodging it as it happens is not likely to happen. Instead, look at the background. See those Hooskis jumping up and down? Well note how high they jump, if they jump low he’s running flat across the ground, if they jump high Big Massif will jump too. So if the background guys don’t jump much, be prepared to jump immediately. If they do jump high, then stand still and let the boss soar overhead.
Big Massif can also call down a giant tower like object and punch it at Mario. For this attack, just hammer it back right as he fires it, the timing isn’t too bad when you get the hang of it.
He can also jump on top of a stack of Hooskis, then run after Mario into the foreground. Here, he’ll make the stack jump towards you (causing a shockwave when it lands), so stay the hell away from where’s jumping too and dodge the shockwave when it follows afterwards. Do the same for a bit to avoid the attack entirely.
But with that said, you may be wondering how to actually defeat him with your own attacks. Honestly? There’s no trick here. Just pound him with the most powerful Luiginary Attacks you have (or in other words, Luiginary Ball and Stack) until he goes down. He does gain strength in the form of more POW when you hit his minions, but this is completely unavoidable due to how attacks work in the Dream World, so it’s best you don’t try and think too much about that aspect.
Just keep attacking away and dodging his attacks like mentioned, and he’ll go down eventually.
Mammoshka
| Boss Info | |
|---|---|
| Mammoshka | |
 |
|
| Location: | Mount Pajamaja |
| HP: | 918 (Mammoshka), 1 (Block Monolift), 1771 (Battle Ring version) |
| Power: | 187, 378 (Mammoshka X) |
| Defence: | 171, 365 (Mammoshka X) |
| Speed: | 48, 78 (Mammoshka X) |
| Experience: | 1100 |
| Coins: | 350 |
| Items: | None |
| Gear: | 1-Up Gloves (50% chance) |
The guardian of Mount Pajamaja you never really knew existed, Mammoshka is a fairly non memorable boss that you likely won’t have too much trouble with. Which is a good job to be honest, since his actual attacks can be kind of annoying to dodge when you go round to it (they just don’t seem to do much damage).
First things first, he might send out a snowball that you have to hammer away. If you succeed, the snowball passes to the other character, who also has to hammer it away until it breaks up. If you don’t however, the brother hit will get trapped inside it and roll comically off to the left, at which point they need to press either A or B respectively to break out. It’s not too bad an attack, and even if you do get hit (which is quite likely), you can easily break free when rolling away anyway.
The creature will also go into the background and throw a giant rock down at Mario and Luigi. Just keep using your hammer to bounce it up into the air, and I think it’ll eventually be flung back towards Mammoshka, causing it damage.
Another attack Mammoshka has is a variant on one every single boss in the game seems to have… the ‘chase Mario and Luigi down the screen while trying to kill them’ move. Here, it chases them forward and tries to suck them in with its trunk, so jump over the suction ‘beam’ each time it’s about to pass Mario or Luigi. If you’re successful and avoid it all the way, you take no damage and the move ends with no real change (the boss takes no damage from failing this attack either). If one player gets sucked in, then you have to jump over them as Mammoshka tries to fire them at their brother like a human missile. It’s not too hard to dodge this shot, Luigi fights back once, and Mario fights back twice, so simply wait until they’ve been sucked in for the second or third time respectively and make the other brother jump as they’re fired.
Later in the fight, the boss will also summon some strange looking Monolift creatures holding blocks. These all hold a helmet, one of which has a spike on top. You’ll need to destroy this one to stop the boss sticking a spiked helmet on its head and becoming immune to jump based attacks.
So with that all said, how to kill this enemy? Well, jumps are your best tactic, or more precisely, Bros Attacks that go off your jump POW stat like Bye Bye Cannon or Dropchopper. This is because the armour the boss is wearing protects it from hammers or ground level direct hits (causing them to do about half damage), and the top of its head is the weakest part of its body.
Just pound away with these, and eventually its armour will crack. This leads to a short (and entertaining) chase downhill, with Mario and Luigi jumping on it in turn until Mammoshka is destroyed.
Elite Trio
| Boss Info | |
|---|---|
| Elite Trio | |
 |
|
| Location: | Dreamy Driftwood Shore |
| HP: | 415 (Corporal Paraplonk), 249 (Private Goomp), 581 (Sergeant Guy), 80 (Sub Goomba), 1 (cannon), 780 (Corporal Paraplonk X), 468 (Private Goomp X), 1092 (Sergeant Guy X) |
| Power: | 169 (Private Goomp), 176 (Corporal Paraplonk), 189 (Sergeant Guy), 312 (Private Goomp X), 324 (Corporal Paraplonk X), 348 (Sergeant Guy X) |
| Defence: | 152 (Private Goomp), 193 (Corporal Paraplonk), 166 (Sergeant Guy), 296 (Private Goomp X), 376 (Corporal Paraplonk X), 323 (Sergeant Guy X) |
| Speed: | 60 (Private Goomp), 120 (Corporal Paraplonk), 75 (Sergeant Guy), 91 (Private Goomp X), 182 (Corporal Paraplonk X), 114 (Sergeant Guy X) |
| Experience: | 2100 |
| Coins: | 200 (Corporal Paraplonk), 300 (Private Goomp), 5 (Sergeant Guy) |
| Items: | Mushroom (2% chance) |
| Gear: | Counter Wear (100% chance, Corporal Paraplonk), Action Hammer (100% chance, Sergeant Guy), Mushroom (100% chance, Private Goomp) |
Yes, the comic relief trio from Bowser’s Inside Story get promoted to ‘elites’ in this game, and actually take you on in a boss battle! And what’s more impressive, they don’t do too badly on the boss front either.
Now, there’s one major thing you’ll need to understand first:
You have to kill all three at once. Otherwise, the one(s) surviving revive those that have fallen and the battle continues. So use multi hitting attacks here, like Luiginary Wall and Luiginary Ball, they’re the easiest to use against the whole group at once.
As far as their attacks go, there are a few of them, and most are fairly simple to dodge. One has them summon a bunch of Shy Guys (supposedly just disguised Goombas here) and have them try and strike the bros with their hammers. Use your own hammers to knock them away/kill them, it’s not difficult to time.
Another move has the Paratroopa dive into his shell and attack Mario. Just jump on him with good timing to knock him back at the others (and a long, long line of enemies loitering around in the background) to counter.
Private Goomp (the Goomba enemy here) will also send a group of Goombas towards Mario. Jump on these guys, and the group will turn around and come from a different angle. Do this a few times to end the attack, otherwise they’ll charge off screen and race back from the left, forcing you to dodge a near impossible horde of Goombas (that thankfully do very little damage).
The trio may also fire the Banzai Bill cannon, forcing Mario to run away from it for a while. Just repeatedly tap the A button to make him sprint ahead and outrun the oncoming missile until it gets destroyed.
They’ll also pick up a giant Bob-omb and then chase Mario down the screen. Here, you simply have to dodge the Goombas that run out as well as Private Goomp, until you reach the end of the area and they hurt themselves with the explosion. It’s not too bad (and you can hurt the Goombas/trio as they try to run past by jumping on them), and it’s mostly an easy attack to avoid.
Really, their normal attacks aren’t hard to dodge. What is annoying here though is simple; the ‘defeat all enemies at once to win’ mechanic mentioned earlier. So I’d recommend you avoid any normal jump or hammer attacks at all (since they hit so few targets that you’d have to be practically psychic to remember how much health each character has at the time) and instead to use Bros Attacks that hit everyone at once, like Luiginary Ball (or later Luiginary Wall or Typhoon). Good luck, it’s not that hard of a battle to be honest.
Shy Guy R Thieves
| Boss Info | |
|---|---|
| Fly Guy R Thieves | |
| Location: | Pi’illo Blimport |
| HP: | 190 (each) |
| Power: | ? |
| Defence: | ? |
| Speed: | ? |
| Experience: | 570 |
| Coins: | 105 |
| Items: | Ultra Mushroom |
| Gear: | Bros Wear (2% chance) |
And now for something slightly different! Yeah, these guys aren’t really much of a boss. In fact, apart from the intro and boss theme, they actually don’t look or behave any different to normal Fly Guy Rs.
You don’t need tips here. I mean, they’re normal enemies you’ve fought hordes of before, so just deal with them like you do any other Fly Guy Rs. And if you’re having trouble or getting impatient for whatever reason, then just pound them to dust with a ton of Bros Attacks to their heads.
Wiggler and Popple
| Boss Info | |
|---|---|
| Popple and Wiggler | |
 |
|
| Location: | Wakeport |
| HP: | 1485 (Wiggler), 999 (Popple) |
| Power: | 195 (Popple), 256 (Wiggler) |
| Defence: | 167 (Popple), 188 (Wiggler) |
| Speed: | 0 (Wiggler), 4 (Popple) |
| Experience: | 500 (Popple), 1000 (Wiggler) |
| Coins: | 400 (Wiggler), 100 (Popple) |
| Items: | 1-Up Deluxe (50% chance, Wiggler), Max Candy (30% chance, Wiggler) |
| Gear: | Coin Bro Gloves DX (100% chance, Popple) |
No, these guys don’t fight in a team, they’re fought individually… to a degree. You see, in the first phase, you’re teamed up with Popple as he tries to rob this house, with your goal being to take down Wiggler because Popple mistook him for a security guard.
And in battle… you have the ‘interesting’ situation of Popple trying to ‘help’ you fight Wiggler and just making it more annoying in the process.
So what can be done about this? Well I suspect you can attack Popple directly to make him run away for a few turns (and then take down Wiggler’s HP in peace until he jumps back into the fray), but it’s not something I’ve ever seen anyone try. Or you can just put up with the odd hit here and there.
Attack wise, Wiggler has a few of them. For his main attack, he’ll charge at one bro until he’s off screen, then come at them again from the opposite side. If Popple isn’t in play here, just jump over Wiggler as he charges by. If he is, well enjoy your hit, since he basically clings on to Mario/Luigi like a coward and completely prevents them jumping out the way.
He also sends out two shockwaves. Jump over them with both Mario bros as they approach.
Additionally, Wiggler might also chase after Mario and Luigi, like so many other bosses do in this game (seriously, every single boss you fight seems to chase them into the foreground…). Just jump his lunges, and get the heck out of the way of him when this happens.
In addition to all these attacks, Popple will also annoy Wiggler by trying to ‘fight’ him on his own. This causes Wiggler to get extremely made, both speeding up his next attack and causing him to chuck Popple at one of the Mario bros himself. So dodge the first attack, then use your hammer to send Popple flying back at Wiggler’s face.
Thankfully, there’s not really any strategy needed when it comes to actually doing damage to Wiggler (unlike the other games where you needed to hurt certain body segments to make his head vulnerable or something), so just pound away at him with whatever Bros Attacks you have until he goes down.
But then, Popple himself attacks you! Yeah, you probably saw this one coming a mile off. You need to take down the thief as well to finish the battle.
On the bright side, Popple himself is extremely easy to defeat. Indeed, he only has two attacks. One’s to summon a bunch of items out of a bag and kick them at Mario or Luigi, one’s to just attempt to walk towards them and attack at close range. For the former, hit back the footballs and ignore the coins, for the latter, hit him with the hammer as he approaches. He doesn’t do much else in this battle or have much health, so he’ll go down in just a few more Bros Attacks.
And that ends the battle. Pity it’s not in the Boss Rush.
Pi’illodium
| Boss Info | |
|---|---|
| Pi’illodium | |
 |
|
| Location: | Somnom Woods |
| HP: | 1673 (Pi’illodium HP), 172 (Pi’illodium’s wings), 2742 (main body, Battle Ring), 282 (wings, Battle Ring) |
| Power: | 328, 437 (Pi’illodium X) |
| Defence: | 333, 538 (Pi’illodium X) |
| Speed: | 94, 117 (Pi’illodium X) |
| Experience: | 3600 |
| Coins: | 600 |
| Items: | None |
| Gear: | Anti-Air Boots DX (100% chance) |
A pretty darn annoying foe, Pi’illodium is the guardian of the Pi’illo Temple and is fought right at the end of the Somnom Woods part of the game. Unfortunately, he’s also one of the toughest bosses in the entire game to fight against if you don’t know what you’re doing, so read this to figure out to how to beat him easily.
First of all, note that you can attack both the main body and wings. This is important, since getting rid of both wings causes them to crack, grounding the boss and making him unable to do his most powerful attacks. So hit each wing with a few Bros Attacks to bring him down, which will also lower his attack power and defence too.
Once that’s done, lay into him with every powerful Bros Attack you have! Watch out though, those weird things he generates will revive his wings if you let them, so use a Taunt Ball or two to take ’em out and keep him from healing.
But that’s just how you attack HIM. How about dodging his attacks? Here’s how to do that.
The main attack he has (and the only one he can use when grounded) has him fire a machine gun style laser at the Mario Bros. Watch the spots on the ground the laser sights go past and the order they go in, and dodge with the respective Mario bro. Or just make both of ’em dodge every shot by jumping at the right time. It’s not too difficult to do that.
The number of shots fired just differ based on his form though. In normal form, he fires about ten laser shots, whereas in his ‘stunned’ form, he fires only four, with only the second and fourth ones being dangerous.
That’s only his most basic move though. When he’s in his default/flight form, he also has these attacks:
- He’ll fly into the background and shoot a purple laser thing at the Mario Bros. Hit it back to him with Mario and Luigi’s hammers, and he’ll hit it back. Keep hitting it back with the right timing (similar to how you hit Ganondorf’s energy balls back at him in Ocarina of Time), and eventually he’ll mess up and take damage.
- He’ll turn into a hammer, fly off screen and come crashing down on one character. This attack absolutely sucks to avoid (because of both how fast he falls and how most of it is spent off screen), so it’s best you get used to releasing the hammer button on impulse about a second after the countdown stops to block it as it happens. You can tell which brother he’ll hit by what colour his eye flashes before he rises into the air.
- He’ll fly into the background, causing Mario and Luigi to run away. Then, Pi’illodium will chase them into the foreground and fire missiles, which they have to dodge by jumping. And charge. Not much advice for dodging this, just jump about half a second or so before the missile reaches your character, and jump Pi’illodium himself when he charges forward. You can also bring the boss down to earth and end the attack early by jumping on him as he charges, but this is so unreliable and requires such split second timing that I wouldn’t rely on it.
Additionally, you should also keep a few more things about this battle in mind. One, this boss seems fairly genre savvy in terms of who to target with its attacks, and I’m 100% sure it even deliberately goes after anyone who happens to be stunned, dazed or on fire and unable to counter. And given how his hammer attack has a fairly high chance of dazing whoever gets hit by it… Then you should find some gear or something that removes status effects, unless you want one of the bros to get repeatedly beaten to ‘death’ before they can move.
Secondly, the Slingsniper and Jetboard Dash seem to be his weaknesses. The former can do huge damage even if his defences haven’t been lowered, and the latter does a hefty amount more than other Bros Attacks if he’s in his ‘weakened’ form. So use them whenever possible.
And that’s all I have to say about Pi’illodium. He’s annoying to fight, has some fairly difficult to dodge attacks and is actually pretty smart as far as in battle AI/decision making goes, but it gets much easier if you can clip his wings and then spam Jetboard Dash and Slingsniper.
Kamek
| Boss Info | |
|---|---|
| Kamek | |
 |
|
| Location: | Dreamy Neo Bowser Castle |
| HP: | 1428 (fight 1), 1743 (fight 2), 1496 (fight 3), 816 (Green Kamek), 544 (Red Kamek), 626 (White Kamek) |
| Power: | 297 (fight 1), 311 (fight 2), 300 (fight 3) |
| Defence: | 266 (fight 1), 270 (fight 2), 286 (fight 3) |
| Speed: | 128 (fight 1), 132 (fight 2), 58 (fight 3) |
| Experience: | 3000 (final battle) |
| Coins: | 500 |
| Items: | None |
| Gear: | Mushroom Gloves (100% chance) |
This is an interesting boss battle, in that it’s not really a traditional ‘single’ fight, you have to chase Kamek down three times and battle him in completely different ways in each instance.
For the first battle (fought within the first dream world entered in Neo Bowser Castle), he mostly fights by himself with traditional attacks like ‘clones’ and magic spells.
In fact, his very first attack/move is to split into four copies of himself, with your aim then being to find the real one and focus your attacks on him (sort of like the Dreamy Mario battle in the first part of the game). In theory, you could follow his movements and track which ‘Kamek’ is which, that’s probably the intended way to win this fight. In practice though, it’s much easier to just strike the entire field with Bros Attacks, since Luiginary Ball, Flame, Wall and Typhoon let you hit everything on the field in one foul swoop. And given that the clones will then vanish for the duration of the attack once hit, all you need to do is hit each clone once to see which one is real and then focus all your attacks on that one.
As for how to dodge his attacks, here’s how to do that:
1. For his magic blast, jump the shot with good timing (which is incredibly easy to do), and then jump over/on the Kamek clone that flies nearest to the ground (which is slightly less easy to do).
2. For the spells, learn the pattern and counter from the right angle. Blue circles come from the bottom of the screen, so hammer downwards to block them. Green squares come from the top, so hammer upwards to block them. Finally, the purple triangles come from either the left or right, so hammer in that direction to block them. Not too bad when you’ve figured out their movement patterns.
And that’s how to fight Kamek form 1. But wait, there are two more fights with this guy left!
For battle 2, he fights mostly the same, but summons a Dry Bones horde to attack too. What you need to do here is to jump on each Dry Bones as it charges at Mario (while dodging their bone throws), and then afterwards you’ll get the chance to shoot their skeletons at Kamek as he flies around in the background. Just make sure to do enough damage to counter his 200 HP per turn health recovery spell he uses at the same time.
Finally, in his final battle, Kamek splits into four different coloured copies of themselves. This time though, not only do they all have different attacks, but you have to kill all four to win the battle, so it’s sort of like a four on one fight rather than your stanard battle (complete with all four Kameks attacking in sequence).
Blue Kamek is the main one, and he has two attacks. His first one is to shoot some magic rings, all of different colours (representing a Kamek copy still alive on the field). These contract round Mario to do damage, so you’ll have to jump with just the right timing to dodge them. Just keep in mind that each different coloured ring takes a different amount of time to contract/do damage.
He also chases Mario into the screen through a Thwomp corridor, where Mario has to go underneath the Thwomps without getting squashed and jump to avoid Kamek’s magic (getting hit by either will instantly end the attack). But beware Mario fans! This does not work like in a 2D platformer, you don’t aim to go under the Thwomps still in the air. No, you have to run towards the ones currently near the ground, since they’ll rise back up by the time you get there and let you safely get past. Go underneath the hanging ones though… and Mario either smashes into their face or ends up as a pancake, since they fall faster than Mario is running. Eventually, dodge another Thwomps and magic shots, and Kamek will smash face first into one, causing him a small amount of damage.
Red Kamek on the other hand has a different attack, the infamous ‘magic broom’ attack. This causes a gigantic broomstick to come down and try and sweep Mario off the edge. To dodge this, you have to move the circle pad either up or to the side with the right timing, with the broom making a small motion indicating which way it’s gonna move. Oh, and it tries to trick Mario too, making small fake out movements before actually going for him (dodging the fake out move means Mario will jump back to the centre at just the right time to get hit). Dodge the broom for a few turns to avoid this attack.
Another one of the clones causes magic spells to appear from all sides. Hammer them away as they approach (the pattern is the same as in the first Kamek battle).
But with that all said, there’s still the question on how to best take down the entire group quickly. And do you know what the answer is here?
Use the Gold and Miracle Badges, freeze time, and use Luiginary Wall on all four Kamek copies at once. Do this attack twice, and I practically guarantee that at least two of the clones WILL go down before they can attack, making the battle much easier. You can then just mop up with the last one or two with whatever Luiginary Attacks you happen to be good at, since you won’t have to heal after a ton of attacks.
That’s how I recommend taking down Kamek in his final battle anyway.
Antasma (final time)
| Boss Info | |
|---|---|
| Antasma (final battle) | |
|
|
| Location: | Neo Bowser Castle |
| HP: | 2435 (Antasma), 90 (Antasmunchie), 3336 (Antasma X), 132 (Antasmunchie X) |
| Power: | 416, 480 (Antasma X) |
| Defence: | 284, 429 (Antasma X) |
| Speed: | 168, 195 (Antasma X) |
| Experience: | 7500 (final battle) |
| Coins: | 900 |
| Items: | Max Candy (2% chance, from Antasmunchie) |
| Gear: | Dark Hammer (100% chance) |
Yep, it’s that guy from the intro again. This time though, he’s well… at his full strength and hence one of the most difficult bosses in the game.
Part of the reason for this is because of his ‘nightmare’ mechanic. You see, if you get hit by his attacks too much (i.e., take a certain amount of damage in one attack), then Mario ends with a black cloud of fog around him and falls asleep straight afterwards.
When this happens, he then gets transported into a twisted nightmare realm where Antasma chases him through a looping passageway filled with holes in the floor. About five or so of these lead to sawblade filled gauntlets that Mario has to navigate through with the gyroscope, and the last gives him some coins and a Mushroom before letting him exit the nightmare. It’s pretty annoying to be honest (especially in the Battle Ring where getting hit here counts as a missed turn), but you can thankfully see which hole leads to the exit by jumping over them and noting the added border colour. Holes with a purple border are deathtraps, the hole with a rainbow border is the exit.
And with that said, you ideally want to avoid falling asleep here as much as possible. So here are some tips on how to avoid his most dangerous attacks:
For his bat attack, look very closely at the screen or turn on the 3D effect. Only a couple of bats are on the same horizontal plane as you, so watch their shadows and jump only those ones as they come.
When Antasma shoots an energy ball and splits into multiple copies, watch where the one with the energy ball moves to, and counter with your hammer when the ‘line’ reaches him. This is by far the easiest of Antasma’s attacks to dodge.
Finally, the dreaded ring attack. Here, Antasma will throw a ring of spikes down towards you, then use his magic to make a shockwave spread out from the centre of the ring. What you need to do is first run so the ring lands around Mario, and then jump when he makes a hand gesture to activate the shockwave, causing it to miss Mario and hit Antasma in the distance. If you do miss the ring however, then you may as well just get hit by it, since you physically cannot dodge the shockwave from outside of it. It does cause damage to Antasma as well if you do jump when outside the ring of spikes, but it’s really not worth the high damage the shockwave will also cause Mario.
So that’s how to dodge Antasma’s basic attacks. That’s not the whole battle though, since a few other ‘gimmicks’ happen here that you need to be aware of.
For instance, at some points, Antasma will pull Dreamy Luigi out of Mario mid battle and chuck him into one of the orb like things surrounding him. When that happens, Mario loses any stat bonuses gained by Dreamy Luigi helping him and all access to Luiginary Attacks until he’s freed. So look carefully at the orb Dreamy Luigi is put in, then attack it with a jump attack to free him.
Oh, and don’t let Antasma eat Dreamy Luigi either. If he does, he gets a massive power boost for a few turns.
He also summons some orb like creatures (that Mario Wiki calls ‘Antasmunchies’) every turn. These boost his attack power when eaten and can be destroyed with your own attacks. Best not to bother with this though, he makes them respawn before his every attack.
Antasma can also go inside a spiky dark shield and turn the orbs surrounding him into small creatures with legs and movement. This makes him invincible to your attacks, and causes him to recover 200 health per turn until all the small creatures are destroyed and Antasma’s shield vanishes. So use Luiginary Wall or Typhoon to take them all out as soon as Antasma summons them.
If you don’t, then they’ll also charge at Mario. Block them with the hammer if this happens, watching out for how Antasma flips the screen upside down after the second or third one. If the screen does get flipped, then keep in mind that your control inputs do not change with it. So if it flips over and is mirrored so the enemy comes from the right, you still aim your hammer like it was attacking from the left. It’s annoying and a bit confusing even in game, but a good use of the Luiginary Wall or Typhoon will stop you ever having to deal with this move anyway.
So it’s a bit of a confusing and rather complex battle to fight. It does have one bright side though, namely that Prince Dreambert helps Mario! Yes, before every one of Antasma’s attacks, Dreambert will heal Mario by restoring him 30 health. He’ll also do this right after Mario falls asleep and ends up having a nightmare, giving you a fair chance in the chase sequence that results. Very useful, and in the main storyline battle, it makes it rather unlikely that you’ll actually die outright.
As for how to actually attack Antasma most easily… I’d recommend either the Luiginary Hammer or the Luiginary Wall. The former does a lot of direct damage and can be aimed quite easily, the latter lets you hit him many times in one turn and can significantly cut down on the amount of orbs the boss has surrounding him too. Use those attacks whenever you can, follow my advice on how to dodge his attacks and remember to heal when necessary, and you’ll eventually make it through this long, difficult fight.
Dreamy Bowser
| Boss Info | |
|---|---|
| Dreamy Bowser | |
 |
|
| Location: | Neo Bowser Castle |
| HP: | 2417 (body), 750 (arms), 3167 (total) |
| Power: | 523 |
| Defence: | 523 (body) |
| Speed: | 87 |
| Experience: | None |
| Coins: | None |
| Items: | None |
| Gear: | None |
It’s the moment of truth. Yes, Dreamy Bowser is the final boss in Mario & Luigi Dream Team, and your final opponent before you can see the credits and unlock things like Hard Mode or the Jukebox! Thankfully though, he’s actually kind of easy compared to the other final bosses in the series.
This is because unlike say, Cackletta’s Soul or the Elder Princess Shroob, Dreamy Bowser doesn’t have two million parts you have to target individually to hit his weak spot. No, you’ve got no stupid stuff like ‘destroy his arms and head to reach the Dream Stone and attack that to do damage’, it’s just ‘hit Dreamy Bowser in the head and he goes down pretty quick’.
Of course, this is made a bit harder by how Dreamy Bowser will try and protect himself by raising his right arm above his face (when you target his head), forcing you to take out the arm first to do any damage to him. But it’s not so bad as the other final battles in the series, and a nice trick I ‘found’ actually removes this whole ‘gimmick’ from the equation altogether.
But with that all said, you still need to know how to dodge his attacks. Here’s how to do so:
For his fireball attack, he’ll shoot fireballs towards Mario and Luigi that each bro has to dodge. Jump them as they come.
He can also take out a gigantic spiked hammer and try and smash one of the heroes with it. Watch where the coin he flips lands (it has Luigi and Mario icons for the heads and tails pictures), then use said bro to block the hammer with his own.
Another attack has one of the characters chased by a Shy Guy manned airship. When this happens, you have to make the brother on the ground jump the energy ball attacks the ships ‘face’ shoots (it glows a second or so before the shot, so jump then) and the other one hammer away the Shy Guys onboard at the same time. So basically, you should jump one energy ball, have Mario or whoever hit a Shy Guy with a hammer, then repeat the pattern until the attack ends.
Dreamy Bowser can also pick up either Mario or Luigi and hold them. When this happens, you need to free the trapped brother by attacking the arm that’s holding, destroying it frees them and lets you use Bros Attacks again. If you’re not quick enough though, Bowser will physically throw said individual off screen, at which point you’ll need to hammer either the A or B button (depending on whether its Mario or Luigi that’s chasing after the flung character) so you catch them, otherwise they’ll either be smashed to death against the floor or caught by Bowser himself at the other end of the chase.
He can also chase Mario and Luigi down the screen into the foreground (you should be used to this kind of thing by now, every boss does it) while shooting out beams of fire. These move from left to right, so you have to make Mario and Luigi jump the flames as they pass. It’s difficult, but it’s doable with enough practice.
In addition to all this, there’s all the aforementioned Shy Guy Airship in the background. At the end of every turn until it’s destroyed, this will shoot cannonballs into the foreground that Mario and Luigi have to deflect with their hammers. You know, like a normal Shy Guy Airtub enemy. Just hammer back as many cannonballs as possible here to do damage and hopefully take out the airship for a few turns.
After a while though, the battle will change a bit. Dreamy Bowser will then move into the background and summon a whole group of ‘dreamy’ enemies that you have to defeat, while simultaneously eating meat and healing about 200 health every turn. When this happens, there are two more attacks you have to dodge.
The first one is the minion ‘charge’, where all these troops run towards Mario and Luigi and have to be dodged or countered by your jumps. Goombas run straight, so just jump over/on them to do damage. Bob-ombs explode, so make sure to jump right over them without directly countering them. Shy Guys jump, so stand still when they approach. Paratroopas fly, and I think they dive down, so dodge them carefully.
Bowser himself will also send out a shockwave during this move, which will kill any enemies it hits and also hit the Mario bros for a significant amount of HP. Jump it with good timing.
Another attack you need to dodge will happen if you decide to use a Taunt Ball on Dreamy Bowser as he’s in the background. If you do this, he’ll run to the foreground and charge after you, trampling his soldiers in the process. Dodge the minions by jumping and try and have Bowser take out as many of them as possible in his fury.
And so that’s how to avoid all of Dreamy Bowser’s powerful attacks. As for how to actually take him down, that’s another story.
One good way of doing damage while he’s in the foreground is by targetting the right arm (so he doesn’t block) and then using a multi hit Bros Attack, like Bomb Derby, Fire Flower, Bye Bye Cannon, Dropchopper, Zee Egg or Star Rocket. This will cause you to do not only a lot of damage to the arm, getting rid of it for your next turn, but also do some minor ‘extra’ damage to both Dreamy Bowser’s head and the other arm at the same time.
Other recommended tips are using Counter Wear (so any damage Bowser does to you hits him back afterwards regardless of his defences) or what I like to call ‘time freezing the final boss so he goes down in ten minutes’.
What is this you may ask? Using the Gold and Miracle Badge combo to freeze time and then pounding his head with Bros Attacks. Because as you may have figured out, someone who’s frozen in time can’t block sod all. So while the effect is active, Bowser literally cannot lift up his right arm to protect his head, meaning it’s now a giant bullseye to aim at with inpunity for two turns. And then, whenever he does recover, you just freeze time again, since it’s still technically your turn. Doing this turns a battle which is usually long and difficult in one that’s over before you can even blink, as the following video demonstrates:

If you’re not willing to do that though, just follow my other advice of using multi hit attacks to weaken all parts of Dreamy Bowser at once.
You may also be wondering how to get rid of the horde of enemies quickly to stop Bowser healing all the damage away in the background. For that, I recommend using a mix of Bomb Derby and Fire Flower, since they hit all enemies on screen and can take out a significantly amount of the magical Koopa Troop minions before they can even move. You can also use Zee Egg if you’ve unlocked it, since that also hits everything on screen for enormous damage.
Hopefully that helps you take down Dreamy Bowser without too much hassle. And if you get stuck, freeze time damnit!
Bowser Jr
| Boss Info | |
|---|---|
| Bowser Jr | |
 |
|
| Location: | Battle Ring |
| HP: | 4099 |
| Power: | ? |
| Defence: | ? |
| Speed: | ? |
| Experience: | None |
| Coins: | None |
| Items: | None |
| Gear: | None |
Wait, what? Bowser Jr is in this game too? Yeah, but he’s not fought in the storyline. Instead, he’s the final opponent in the Battle Medley in the Battle Ring. Here’s how his fight works and how to beat him most easily.
Basically, Bowser Jr is this game’s version of Bowser X from Bowser’s Inside Story. Or in other words, after you use a Bros Attack on him, he’ll run over to the bro who used it and tiggle him with a paintbrush, causing him to drop said Bros Attack. This lets Bowser Jr steal the attack, and hence stops Mario and Luigi using it for a few turns (or until a special thing is done later in the fight).
In addition to this, his Clown Car also blocks any attack that doesn’t hit from above. So in other words, when Bowser Jr is riding the Clown Car, the Fire Flower, Bomb Derby and Slingsniper will always hit for zero damage. Keep that in mind.
With that all said, his attacks (which I’ll now explain how to dodge) let you get round these gimmicks. His first one is to throw a spike ball at either Mario or Luigi, which then has to be juggled between the two Mario bros with their hammers, all while charging at them in his Clown Car. Honestly, it’s probably best you just let the spike ball hit you here, since trying to juggle it and simultaneously hitting Bowser Jr’s vehicle with the hammer to knock it away is rather annoying to say the least. Once the Clown Car is hit though, it’ll fall down and Bowser Jr will crawl towards one of the bros (with the vehicle on his head). Wait until he shows his face (to breathe fire) and knock him away with the hammer to end the attack.
Bowser Jr can also summon a Bob-omb and have it run rings around the Mario bros. Dodge the Bob-omb by jumping over it, and then make both bros jump when Bowser Jr breathes fire to dodge both the bomb and his fire breath shot in one move. The Bob-omb will eventually explode, ending the attack.
Yet another thing he can do is to jump out the Clown Car and summon a few Shy Guys with a rope made of fire, similar to the one from that old Mario Party mini game (you know, Hot Rope Jump). Dodge the flames by making Mario and Luigi jump the rope as it passes by, and eventually it should hit Bowser Jr himself, causing a bit of damage and ending the attack.
He can also have some ‘presents’ sent out, with both him and the Mario bros opening them to see what happens. Some give you items, some do nothing, one has a bomb inside it. Not much to recommend here, it’s seemingly luck based what present has what ‘gift’ inside, so you could easily either end up getting a ton of useful items or getting blown up without knowing why. Ah well, at least you get to watch Bowser Jr’s nervous face if it turns out the last present has the bomb and its right in front of him!
These last two attacks are crucial. You see, when he does these, he jumps out of the Clown Car he’s riding. And when this happens? Not only can you now use Slingsniper, Bomb Derby or Fire Flower on his unprotected self, but you can also jump INSIDE the Clown Car, resulting in a funny (and absolutely awesome) chase scene!
Yes, Mario and Luigi get to chase Bowser Jr through the streets in the Clown Car, sort of like what the other bosses did to them! And what’s even better still is that you not only get to throw items like Shells, bricks and spike balls at the young Koopa prince, but also your own stolen Bros Attacks! Doing so will then let you use them when the battle resumes. At the end, the Clown Car is sending flying into Bowser Jr, doing damage and putting it out of comission for a few turns.
This as mentioned lets you use any attack you want on Bowser Jr without the car blocking it, and generally makes him far easier to hit and more vulnerable to damage. You can also then use your attacks on either the Clown Car or the Monty Moles trying to repair it to put it out of action for even longer.
As far as fighting back goes, you want to make sure you don’t use all your best moves right off the bat. Indeed, if he can steal them, you want to use start with some of your weaker ones (like Bye Bye Cannon or the like) while he’s in the Clown Car and then save the more powerful stuff (like Zee Egg or Star Rocket) for when he’s just standing on the ground normally. Use normal jump moves if possible too.
You obviously also want to chase him with his own Clown Car whenever possible too, it lets you do lots of damage (about equal to a Bros Attack) in one turn and gets you your stolen Bros Attacks back.
Finally, if you want to use the same attack multiple times, the time freezing badge WILL stop him stealing your Bros Attacks after each use (and he won’t even steal the ones used while he’s frozen when the effect wears off). So it’s a really good badge effect to use later in the battle when you want to use Zee Egg and Star Rocket multiple times in a row.
Honestly though? Bowser Jr isn’t really that bad. In fact, I’d say I had more trouble fighting Antasma X and Pi’illodium X than I did this guy, and the actual battle is one of the most fun things in the whole game. You shouldn’t have too much trouble with it.
Giant Bosses
Drilldigger
| Boss Info | |
|---|---|
| Robo Drilldigger | |
 |
|
| Location: | Dreamy Dozing Sands |
| HP: | ? |
| Power: | ? |
| Defence: | ? |
| Speed: | ? |
| Experience: | None |
| Coins: | 500 |
| Items: | Super Candy, Super Nut, 1-Up Deluxe |
| Gear: | Snare Boots |
It’s your first ever giant boss, and if you’re playing on normal mode, its mostly a walk in the park. Basically, Drilldigger (aka the giant robot thing you’re fighting here) has two forms and a couple of basic attacks, and if you have to counter them by carefully using the touch screen, as well as unleashing the right normal attacks to hit each of them.
The boss will start in normal form (aka standing on the ground in an upright stance). Here, Jump attacks won’t do much damage, so choose your Hammer attack (there’s only one in this first giant battle) and send him flying into the background for some decent damage.
After your first attack, Drilldigger will choose one of two attacks. For the first one, he’ll turn into a drill tank, drive back to the left and charge at Giant Luigi at full speed. So prepare your hammer and swipe it to the left as he’s just about to reach Luigi to send him flying and avoid damage (while doing damage to the boss in the process).
He could also summon a tornado. If he does so, he’ll send out smaller tornadoes that Luigi has to jump over by swiping up with the stylus. Do that, and then the tornado will end up somewhere in the background.
What you do next depends a bit on what attack was used before. Did he turn into a drill tank? Then definitely DO NOT jump on the boss, since his drills are pointing upwards and act as spikes, causing you to do no damage if you try. instead, hammer him away like normal. If he summoned a tornado… well, also hit him with the hammer, since this will send him into the background and cause Drilldigger to get sucked into the tornado, which sends him flying into the air and does even more damage.
Additionally, he might change into a third form, a flying variant. In this form, hammer attacks won’t work, so use your jump attack on him to do damage. He’ll then shoot out drill shaped missiles that you need to hammer away, so do that and then send him flying with the hammer when he charges as well.
Later in the battle, he’ll shoot an energy ball at Luigi. If it’s your first time, this attack WILL hit, to give Dreambert an annoying chance to explain the Rhythm Mushroom Bros Attack needed to heal in these battles (thankfully you can keep healing until your health is fully restored, so it’s not like it hinders you too much). After this though, Luigi will block said energy ball with the hammer, and you’ll have to repeatedly hammer the circle shaped symbol on his hammer to push the energy ball away. Do this enough, and Luigi will blast it back, causing damage to Drilldigger in the process.
After a few more rounds, Drilldigger will summon an even bigger tornado than usual. This one will completely surround the boss, meaning that you have to track his movements to figure out whether to use the hammer or jump attack (since he’s also constantly changing form at this point). Just look at where his face last appears, then use the relevant attack to do damage.
Thankfully, this tornado will then go away when Drilldigger attacks, so counter whatever he does like you normally would.
Eventually, Drilldigger goes down. Now, unlike a normal boss battle, you don’t just do whatever the hell you want to finish the battle. Nope, instead, at about 1HP left, the giant boss is disabled and a new attack called ‘Finishing Bros’ is activated.
This attack has Luigi jump up into space, then send Mario down towards the enemy on a star. So move the gyroscope to align it with the boss, and hit it to finish the battle (hitting the star marker gets you Excellent, hitting anywhere else gets you a different/lesser ranking).
Mount Pajamaja
| Boss Info | |
|---|---|
| Mount Pajamaja | |
 |
|
| Location: | Dreamy Mount Pajamaja |
| HP: | ? |
| Power: | ? |
| Defence: | ? |
| Speed: | ? |
| Experience: | None |
| Coins: | 560 |
| Items: | Ultra Mushroom, Ultrasyrup Jar, Refreshing Herb |
| Gear: | Metal Gloves |
Well, this was unexpected! The volcano you were climbing turns hostile in the dream world!
Either way, here’s a turn by turn strategy to take him down.
For the first turn, use the Hammer Uppercut (which Dreambert will teach you upon starting the battle) to knock the boss over. This makes him vulnerable to attacks like your jump, and lowers his defences significantly until he gets up.
Next, use the spin jump on the boss to take away about a fifth of his lifebar.
He’ll then get up, step back and blast a rock towards Luigi. Now, hit it back with the hammer, like you would Ganon’s energy attacks in the Zelda series. Eventually, the rock will get stuck in the volcano’s top and explode, causing him damage.
Now, use the Hammer Uppercut to knock him over, and use a normal jump (Mario will be too exhausted to use a special attack at this point).
The boss should then charge. Keep swiping the stylus to the left to push him back and do some damage.
At around this point, he’ll then talk about how he’s becoming ‘superheated’. This causes him to sink down into the ground and cause a giant mountain to appear underneath him.
Use the hammer uppercut to knock the first layer of mountain away. It’ll hit a volcano in the background and fly back, smashing the boss on the head for a bit of damage.
The next attack the boss will use is to shoot some balls of lava that roll along the floor at Luigi. This will cause some circles to appear. Repeatedly hit the circles the lava is going across to destroy the bits of lava and stop Luigi taking damage.
You’ll then be able to attack again. This time, use a normal (side) hammer swing to knock the last bit of mountain away from the boss. It’ll bounce off another volcano and clout him on the head.
The boss will then do an attack where he shoots balls of lava into the air, causing them to come down on Luigi’s head. So wait until the lava is falling in front of Luigi, and hammer it at the boss with Luigi’s hammer to cause him damage.
Eventually, the battle will go back to the first cycle, where the boss charges at Luigi, you have to knock him over with the uppercut, etc. Of course, he’ll knock the rocks back more (and at quicker speeds than before), and his attacks do get harder to dodge due to faster timing being required, but it’s much the same as before.
Repeat the process mentioned until he’s at minimum health, then using the Finishing Bros to finish him off.
Earthwake
| Boss Info | |
|---|---|
| Earthwake | |
 |
|
| Location: | Dreamy Wakeport |
| HP: | ? |
| Power: | ? |
| Defence: | ? |
| Speed: | ? |
| Experience: | None |
| Coins: | 1000 |
| Items: | Ultra Candy, Ultra Nut, 1-Up Deluxe |
| Gear: | Filler Gloves DX |
What is this thing? Did a bunch of buildings seriously form together into a humongous mecha and try to kill the Mario bros? What’s going on?
Either way, it’s down to Giant Dreamy Luigi to stop it, and here’s how.
First of all, note the ocean behind the boss. Basically, your goal here is to knock Earthwake back so he falls in the water and is open to repeat attacks, sort of like the Tower of Yikk boss from Bowser’s Inside Story. So start with a Hammer Uppercut and send him flying!
This will cause him to fall into the water. Now, rapidly swipe the stylus down to smash his head in with the hammer. If you’ve done it enough (and got a Great rating), he’ll now be dizzy and open to attack. Swipe the stylus towards him fast to knock him into the distance for more damage.
With that done, Earthwake will land back on the main ‘arena’ and attack with one of the following moves:
- The projectile shield. Here, the boss will make the various parts of his body fly around his head in a forcefield style pattern. Knock the parts away with the hammer, and when all are gone, send the head flying with said hammer too.
- The building ball. He’ll pick up a bunch of buildings, make them into a giant ball and send it towards Luigi. Jump on the ball, then tilt the gyroscope so it (and Luigi) smash into the ball to send him backwards. Just watch out for his swiping actions, which will knock Luigi down and cause damage.
After one of these attacks, the boss will gain armour on his head. Crack this armour by using the Drill Stomp, then dodge his next attack, using the Hammer Uppercut to send him back into the water. Repeat the pattern where you hammer his head in.
Later, Earthwake will then make even more armour appear and surround him. Destroy this with a fully charged Drill Stomp, then avoid whatever attacks follow.
After this, you’ll see a scene where he shouts about ‘bad damage!’ and threatens to kill the Mario bros. It’s also where you get introduced to his infamous ‘final’ attack, the flying hammer strike. This move has him turn into a gigantic hammer and swing towards Luigi in either a high or low arc, which must either be dodged by swiping down on the touch screen with good timing or blocking by swiping up when the hammer strikes high (also with good timing). It’s annoying to dodge, is done fairly often, and can take your health from max down to zero if you’re unlucky, so swing when his eyes flash to counter/dodge each strike.
Eventually though, he’ll go down to minimal health, and you can just finish him off with Finishing Bros to end the battle.
Zeekeeper
| Boss Info | |
|---|---|
| Zeekeeper | |
 |
|
| Location: | Dreamy Somnom Woods |
| HP: | ? |
| Power: | ? |
| Defence: | ? |
| Speed: | ? |
| Experience: | None |
| Coins: | 1200 |
| Items: | Max Candy, Max Nut, 1-Up Deluxe |
| Gear: | Boost Wear |
Yeah, you read that right! Giant Luigi, for reasons only known to him, decided to battle the legendary guardian of Pi’illo Island in a giant battle! And it’s all because of a freaking misunderstanding that’s resolved literally two seconds after the fight. Oh well, here’s to win this dangerous boss battle.
First things first, you should notice that right off the start, the Zeekeeper attacks first. This is because unlike all the other giant battles in the game, the usual pattern of ‘Luigi fights, boss fights, repeat’ isn’t used here, with Luigi having to counter the boss’ attacks for a couple of turns before he gets the chance to use one of his own moves or even heal.
So dodge the charge attack the Zeekeeper uses (by either ducking or jumping depending on whether he’s flying low or high at the time), and you’ll see Dreambert tell you to grab the boss. Now, you have to repeatedly swipe down on the touch screen to pull the boss down, as well as grab as its feet when it tries to escape by tapping the touch screen with good timing. It’s not difficult, and after three goes of this, Luigi will pull the boss to the ground, lobbing it in front of him and then body slamming it afterwards.
This is when you get to physically attack. So use a Drill Stomp to massive damage to the Zeekeeper, and then use a normal jump attack afterwards.
It’ll then take off and begin flying away again, with Luigi giving chase. But hang on, this isn’t like before! No, the boss is now opening a dimensional rift to a new area. Cue gyroscope section.
This section of the fight… is annoying. You see, not only are motion controls kind of imprecise to begin with, but this game’s ones seem to have a rather unfair tendency to completely stop working at the worst possible time. And guess what? This dimensional rift section is exactly where they tend to fail in all kinds of aggravating, unfair ways.
Assuming the section does work though, move Luigi around by tilting the 3DS to make him avoid the energy ball attacks the boss uses, and then it’ll try to lunge at him. Avoid this by quickly tilting the 3DS in the other direction to make Luigi move out the way of it.
Now, you have to ram into the boss with the gyroscope controls. So tilt them towards the boss to make Luigi hit it, and do this two or three times.
The energy ball attack will now start again. You know the drill. Dodge the energy balls, dodge the boss’ charge attack, ram into it. Do this twice and you’ll exit the dimensional rift.
But wait! The battle is far from over, and it turns out the Zeekeeper has a ton more attacks to use!
Like an egg attack. Here, the Zeekeeper will shoot a ton of eggs at Luigi, who has to deflect them by tapping them with the hammer as they roll towards him. You may also see Mushrooms here too, ignore them to have Luigi collect them automatically and restore health.
After this, he’ll likely do his charge attack again. Dodge by jumping or ducking as usual. He may also change direction at the last second now, so watch very carefully before you do anything rash when trying to counter/dodge the attack.
Finally, the boss will send out some energy balls that move around. Tap them to have Luigi throw tree stumps at them, and when they’re all broken, keep tapping the Zeekeeper with the stylus to have Luigi throw more trees at him as well.
Eventually, Luigi will grab onto the Zeekeeper again. Pull him down like always, and then when you get your turns at long last, use the Drill Stomp and normal jump attacks to hammer away at his health even more.
This will cause him to open a second dimensional rift. You know the drill here. Dodge his energy ball attacks, avoid his ramming attack, tilt the 3DS towards the boss to have Luigi ram into him and cause damage. After this point, he’ll exit the rift, do one of his three normal attacks again and the cycle repeats until his health gets low enough. Then, use Finishing Bros to end the battle.
Giant Bowser
| Boss Info | |
|---|---|
| Giant Bowser | |
 |
|
| Location: | Dreamy Neo Bowser Castle |
| HP: | ? |
| Power: | ? |
| Defence: | ? |
| Speed: | ? |
| Experience: | None |
| Coins: | 2000 |
| Items: | Max Candy, Max Nut, 1-Up Deluxe |
| Gear: | Supreme Hammer |
Well, here it is! The moment everyone’s been waiting for, where Luigi gets to fight Giant Bowser from the last game!
And it’s a difficult fight too. Here’s how to win.
First up, you’ll start on a long bridge over lava. This bridge will gradually get destroyed in a few turns by Bowser’s Shy Guy minions in their airships, so you’ll have to keep knocking him back and moving on to survive.
So use the hammer uppercut first to knock Bowser back.
He’ll then begin to charge at Luigi. This attack has three different phrases to it. In phase 1, you have to repeatedly scribble on the touch screen to shake him off Luigi. In the next phase, you need to repeatedly swipe to the left on the touch screen to push him back (like you did against the volcano boss earlier). Finally, Bowser will charge at Luigi.
However, he’s not running straight here, but to an angle. So dodge in their direction of the bridge that Bowser is not running towards to make him miss his charge and fall in the lava for some damage.
If you dodged that, Bowser should now be standing on a grate. Dreambert will tell you the floor is unstable, so that’s your cue to use the spin jump on Bowser to hit him hard enough that floor collapses underneath. This will cause him to hit the lava and take more damage.
Now, the above pattern will likely repeat until Bowser reaches the end of the bridge. He’ll then jump to a new area, with a castle to the left.
This marks the next main part of the battle, complete with a new strategy to counter.
First of all, he’ll summon some Magikoopas. These guys will shoot a giant ball of magic at Luigi, so hammer it back to get rid of them.
Next, some Shy Guys with spears will walk out the castle. This is basically scratch damage, the Shy Guys will charge up to Luigi’s feet and start poking him with spears for very tiny amounts of damage. Tap them all to throw them off.
An airship brigade will be next. These Shy Guy manned fleets will shoot a series of cannon balls at Luig, and you have to time the hammer right to hit them back. If they’re vertically aligned, then swing the hammer up when the cannonballs get close. If they’re all line up horizontally, swing the hammer to the right to block the attack.
This will cause the next ‘attack’ to start. Here, some Shy Guys will come out the castle with some plates of meat and chuck them towards Bowser. Don’t let him eat the meat, it restores his health! Instead, pound the floor when the meat is just above Bowser’s head to cause him to duck and the meat to smack him on the top of head. Do this a few times.
Bowser will now jump on top of the castle and do a belly flop towards Luigi (like that move in Super Smash Bros). So wait until he’s above Luigi, then swipe the stylus to the right to dodge the attack, knocking Bowser defenceless.
Luigi will then pick up Bowser by the tail! Yep, just like in Super Mario 64 where Mario had to throw Bowser into the bombs around the arena by spinning him around and launching. So make as many circles in the direction marked on the touch screen as possible to fling Bowser through the castle and off the bridge into the lava.
The fight will then move to yet another bridge. Here, Bowser has another new attack.
This time, he breathes fire like in the classic games. So wait until he’s about to shoot fire at Luigi, then swipe up on the touch screen to make Luigi dodge and grab on to a Shy Guy airship above. Luigi will then start swinging left and right, so tap the touch screen when he’s leaning to the left to make him land on Bowser and do damage.
Repeat the above once more. The battle might now play out like phase 1, with him charging again, so counter that like you did the first time.
Soon, Bowser will move to another bridge with a castle. This time, he’ll summon the Shy Guy feast before the attack squad, so stop him healing when that happens. The attack squad also now comes in two groups, so you’ll have to get rid of two groups of Shy Guys to avoid damage.
The airships will appear next. This time, they’ll line up four times to attack, so block their attacks each time they shoot.
Bowser will then repeat his belly flop move, so dodge it and throw him off the edge again.
If you’ve done enough damage by this point, Bowser and Luigi will jump to a circular arena with some buildings around the edge. Here, you’ll need to use the gyroscope to knock Bowser back as spinning Luigi and send him off the edge into the lava. It’s rather annoying (partly because the 3DS gyroscope is a right pain to use), but you can restore health by destroying the buildings if you’re having trouble.
Once this is done, its Finishing Bros time! You know what to do, right? It’s all over!
Oops, turns out is isn’t, as Kamek comes in and makes Bowser even bigger. This phase of the battle is much simpler though, so it’s not all bad news.
Either way, Bowser here has two attacks. For the first one, he’ll try and stomp on giant Luigi, so rapidly swipe upwards on the touch screen to chuck him away (sending him into the lava). For the second one, he’ll send out a fireball, and Luigi has to counter by hammering away at the target on the fireball (sending him into the lava as well). Once he’s in the lava, a new finishing attack appears.
This one is basically a more powerful Finishing Bros. So swipe up on the touch screen to make Luigi jump into space like normal, and send Mario down towards Bowser on a star.
However, it’s not easy this time around. Instead of going down diagonally, the star sends Mario at Bowser from the side. And whereas Finishing Bros had no obstacles, this one has you dodge fireballs by tilting the 3DS in the other direction.
So tilt the 3DS from side to side to dodge the fireballs flying towards you (if there are ones in all corners, then hold the 3DS completely flat instead), and eventually you’ll smash into Giant Bowser, defeating him and ending the battle. Thankfully, it’s not too much of a big deal if you mess up (Giant Bowser’s normal attacks in his last form are ridiculously easy to dodge/counter and you can simplify the Star Driver attack if you fail too many times), and you’ll eventually take down the last giant boss in the game!
Some Notes:
All giant boss pictures are of their stronger X/Battle Ring versions. That’s because those were the only pictures I could find.
Pictures are taken from the Mario Wiki page on Mario & Luigi Dream Team.
Giant Bosses always drop gear when defeated, so no chance is given for that. For smaller items, it seems to be entirely random what they drop.
2 Comments
What? “Inpunity” is invalid! What kind of word is this? What the heck is this? Why do you have misspelled words?
CM30, how dare you turn “Standard” into “Stanard”. You’re in trouble.