
As you know, Perks are one of the most important things you’ll need in the Emerald Rush mode for Donkey Kong Bananza. These are ability upgrades that do things like cause enemies to drop more items, and they’re key for making it through harder difficulty levels given the insane quotas needed to clear each round.
Unfortunately, finding a list of these things is not the easiest thing in the world. Why? Because most guides are woefully lacking here. The Super Mario Wiki doesn’t have a page yet, the guides from major gaming news sites are blatantly unfinished, and the resources found in Google Search are usually placeholders at best.
So today, we’re gonna fix that. We’re gonna list every Perk in Emerald Rush, say which ones are worth getting, and explain some tips on how to use them.
The List
First, here’s the list. You can see all the perks in-game via this screenshot:
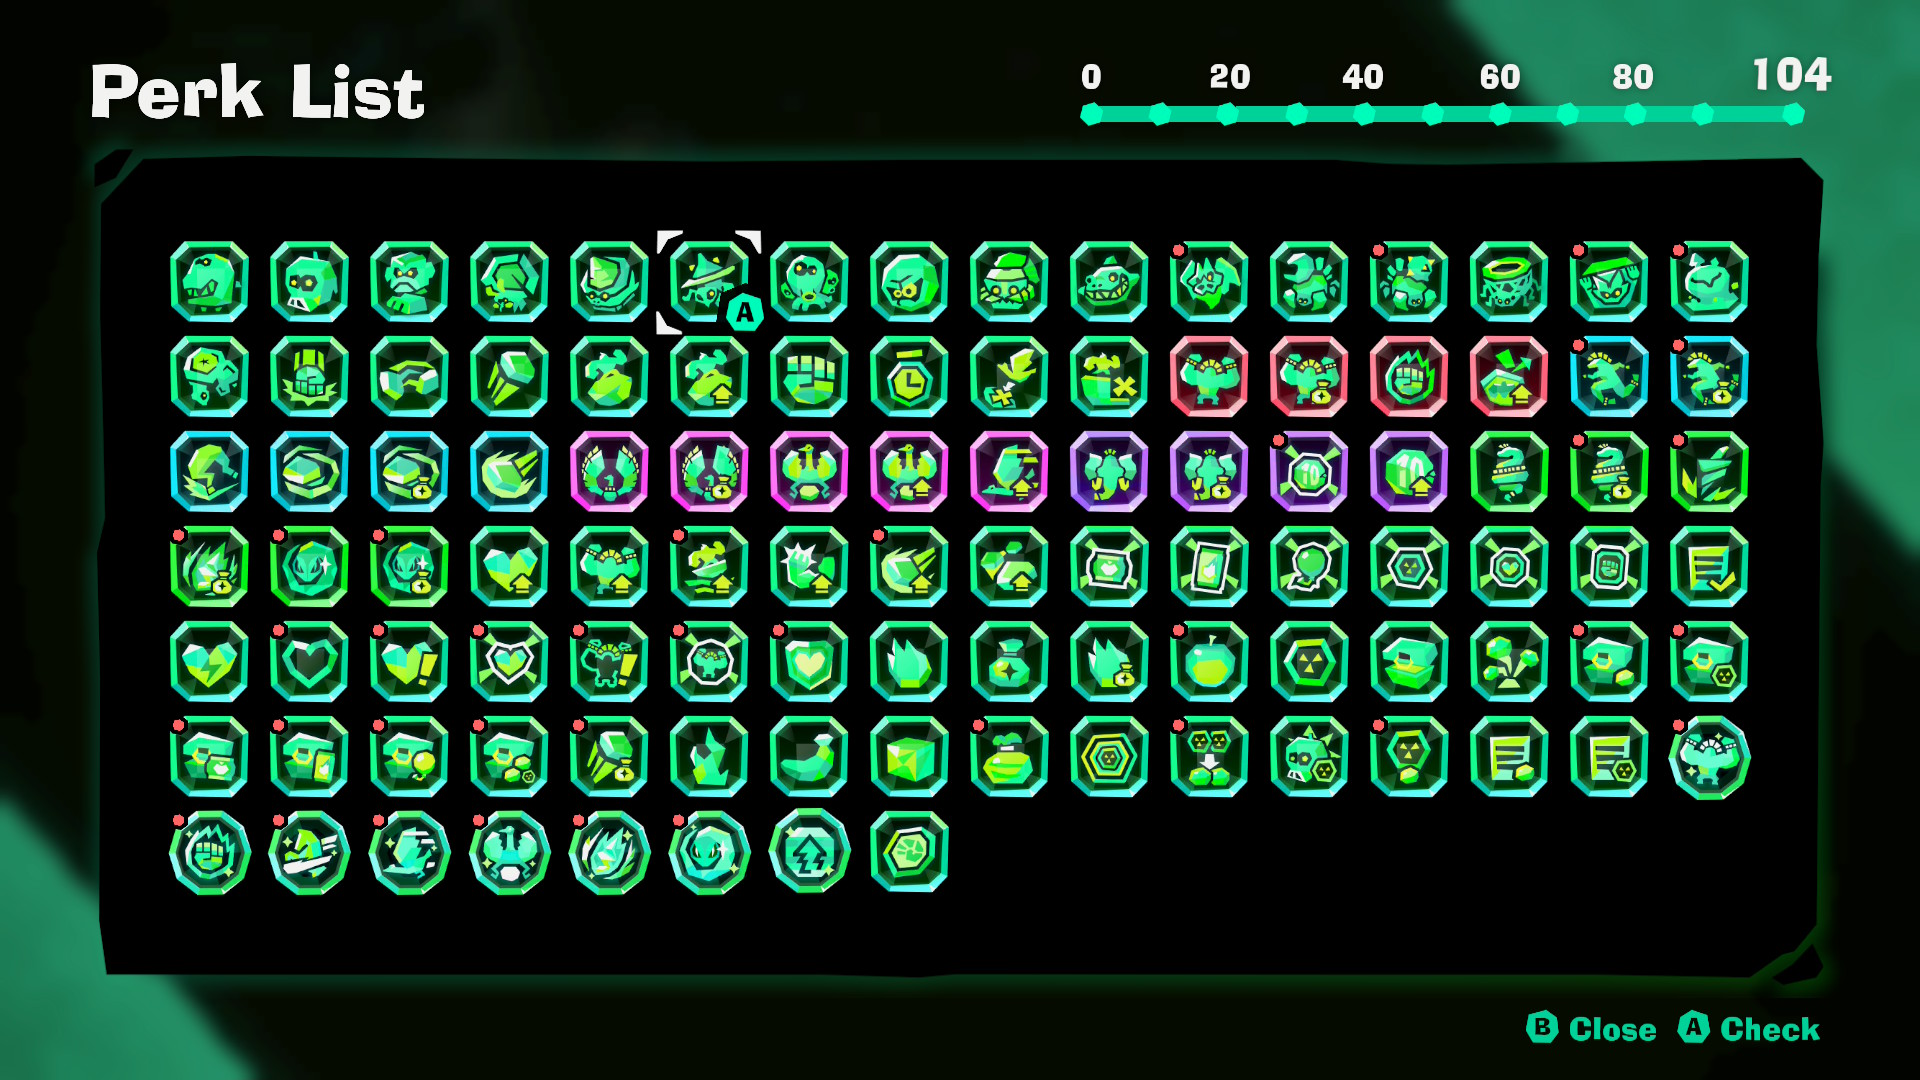
Every Emerald Rush Perk seen in-game
Or scroll through a table with every perk listed below:
| Perk Name | Description | Notes |
|---|---|---|
| Crockoid Demolisher | More emerald ore will appear after you defeat a Crockoid. | N/A |
| Squeeloid Demolisher | More emerald ore will appear after you defeat a Squeeloid. | N/A |
| Stompoid Demolisher | More emerald ore will appear after you defeat a Stompoid. | N/A |
| Antickoid Demolisher | More emerald ore will appear after you defeat an Antickoid. | N/A |
| Molevoloid Demolisher | More emerald ore will appear after you defeat a Molevoloid. | N/A |
| Buzzoid Demolisher | More emerald ore will appear after you defeat a Buzzoid. | N/A |
| Peekaboopoid Demolisher | More emerald ore will appear after you defeat a Peekaboopoid. | This is incredibly broken in the Lagoon Layer, where these enemies respawn every time you teleport. Stack up this perk, and repeat to hit the 10 million emerald cap in no time. |
| Rolluskoid Demolisher | More emerald ore will appear after you defeat a Rolluskoid. | N/A |
| Munchoid Demolisher | More emerald ore will appear after you defeat a Munchoid. | N/A |
| Trailfinoid Demolisher | More emerald ore will appear after you defeat a Trailfinoid. | Only available in the Resort Layer. |
| Batteroid Demolisher | More emerald ore will appear after you defeat a Batteroid. | Only available in the Tempest Layer. |
| Gloominoid Demolisher | More emerald ore will appear after you defeat a Gloominoid. | Only available in the Radiance Layer. |
| Illuminoid Demolisher | More emerald ore will appear after you defeat an Illuminoid. | Only available in the Radiance Layer. |
| Trapantuloid Demolisher | More emerald ore will appear after you defeat a Trapantuloid. | Only available in the Radiance Layer. |
| Wallopoid Demolisher | More emerald ore will appear after you defeat a Wallopoid. | Only available in the Feast Layer. |
| Muckoid Demolisher | More emerald ore will appear after you defeat a Muckoid. | Only available in the Feast Layer. |
| Glitzoid Demolisher | More chips will appear each time you punch a Glitzoid. | These are those strange creatures with a tail made of chips that you find in certain areas. We’ve found them in the Hilltop Layer, the Forest Layer, the Freezer Layer, the Radiance Layer and the Feast Layer, though they’re likely in others too. |
| Droppin’ Beat | More emerald ore will appear after you defeat an enemy with a Dive Punch. | N/A |
| Batter-Up Beat | More emerald ore will appear after you defeat an enemy by swinging a chunk at them. | N/A |
| Fastball Beat | More emerald ore will appear after you defeat an enemy by throwing a chunk at them. | Useful against Buzzoids and Muckoids, less useful against everything else. |
| Surfin’ Beat | More emerald ore will appear after you defeat an enemy by Turf Surfing into them. | Works well when paired with other Surf Turf related perks, like Turf Groove. |
| Turf Groove | More emerald ore will appear based on the distance you travel while Turf Surfing. | Surprisingly busted, especially on the Hilltop Layer. Get this, and surf at almost all times. |
| Bare-Knuckle Beat | For a limited number of times, 300% more emerald ore will appear after defeating enemies by punching. | Works very well alongside Green Scene. |
| Green Scene | For a limited amount of time, 400% more emerald ore will appear after defeating enemies. | Works very well alongside Bare-Knuckle Beat. |
| Hang-Time Beat | More emerald ore will appear after you defeat an enemy in midair. | N/A |
| Lowdown Beat | More emerald ore will appear after you defeat an enemy below you. | N/A |
| Wild Warrior | More emerald ore will appear after you defeat an enemy during a Kong Bananza transformation. | N/A |
| Kong Forager | More items will appear while smashing terrain during a Kong Bananza transformation. | Probably the second-best Forager perk, since the Kong Bananza is one of the two best Bananzas in both Emerald Rush and the game as a whole. |
| Windup Beat | More emerald ore will appear after you defeat an enemy with a Charge Punch. | N/A |
| Solid Groove | More emerald ore will appear based on the amount of damage you sustain with Kong Armor. | I don’t think I’ve ever found a use for this. |
| Super Sprinter | More emerald ore will appear after you defeat an enemy during a Zebra Bananza transformation. | N/A |
| Zebra Forager | More items will appear while smashing terrain during a Zebra Bananza transformation. | Mostly useless. You’ll never be smashing terrain as a Zebra. |
| Kickin’ Beat | More emerald ore will appear after you defeat an enemy with Brake Blast. | One of the least useful perks in the game, since Brake Blast is an inconvenient and often ineffective attack. |
| Spinnin’ Beat | More emerald ore will appear after you defeat an enemy with a Spin Slam. | N/A |
| Swirl Forager | More items will appear while smashing terrain with Spin Slam. | N/A |
| Slingin’ Beat | More emerald ore will appear after you defeat an enemy with Spin Shot. | N/A |
| Fearless Flyer | More emerald ore will appear after you defeat an enemy during an Ostrich Bananza transformation. | N/A |
| Ostrich Forager | More items will appear while smashing terrain during an Ostrich Bananza transformation. | N/A |
| Eggsplosive Beat | More emerald ore will appear after you defeat an enemy with an Egg Bomb. | N/A |
| Egg Groove | More emerald ore will appear based on the number of times an Egg Bomb is dropped. | Probably the most useful egg related perk, since you don’t need to hit enemies to increase the counter. |
| Glide Groove | More emerald ore will appear based on the distance you flutter or use Glide. | This can be surprisingly useful, if you luck into getting the Ostrich Bananza and Glide early. |
| Typhoon Titan | More emerald ore will appear after you defeat an enemy during an Elephant Bananza transformation. | Moderately useful, since the suction attack decimates many weaker enemies. |
| Elephant Forager | More items will appear while smashing terrain during an Elephant Bananza transformation. | The most useful Forager perk, since the Elephant Bananza is amazing for smashing terrain (and will be your go-to for missions like “Smash Sand” and “Smash Stone”). |
| Rock-Ensemble Beat | More emerald ore will appear after defeating an enemy based on the number of different chunk types you have stored. | N/A |
| Storage Groove | More emerald ore will appear based on the number of times you store a chunk in your trunk. | Surprisingly useful, given you store chunks automatically when you suck up terrain. |
| Hyper Hopper | More emerald ore will appear after you defeat an enemy during a Snake Bananza transformation. | It’s rare that fighting an enemy with the Snake Bananza is the ideal way to do things. |
| Snake Forager | More items will appear while smashing terrain during a Snake Bananza transformation. | This sees very little use, since the Snake Bananza is only good at smashing terrain above you. |
| Jumpin’ Beat | More emerald ore will appear after you defeat an enemy with Jump Burst. | This is mostly useless for most players. |
| Touchdown Forager | More emerald ore will appear while smashing terrain with Meteor Punch. | N/A |
| Slo-Mo Beat | More emerald ore will appear after you defeat an enemy during Glare’s slow-motion effect. | N/A |
| Glaring Forager | More items will appear while smashing terrain during Glare’s slow-motion effect. | This will probably never come up, so don’t pick this. |
| Hearty Groove | More emerald ore will appear based on the number of extra hearts you recover while your health is already full. | N/A |
| Encore Groove | More emerald ore will appear based on the amount of time you spend in any Bananza form. | An incredibly useful perk overall, since you’ll be spending a lot of time in Bananza forms during the harder difficulty levels. |
| Surf Groove | More emerald ore will appear based on the distance you travel over water while using Surf Surf. | Like Turf Groove, except on water. Poison counts here, as does icy water. Busted on DK Island and in the Resort Layer. |
| Charge Groove | More emerald ore will appear based on the amount of time you charge up any charge-based skills. | N/A |
| Spin Groove | More emerald ore will appear based on the amount of time any spin-based skills are active. | N/A |
| Skip Groove | More emerald ore will appear based on the number of times you do continuous rolling water-skip jumps. | This is a bit trickier than it sounds. This Reddit post explains why. |
| Apple Hoarder | More emerald ore will appear after defeating an enemy based on the number of Apple Juice cans you have stored. | Surprisingly useful. In fact, all the hoarder perks are. |
| Melon Hoarder | More emerald ore will appear after defeating an enemy based on the number of Melon Juice cans you have stored. | See above |
| Balloon Hoarder | More emerald ore will appear after defeating an enemy based on the number of Red Balloons you have stored. | See above |
| Chip Hoarder | More emerald ore will appear after defeating an enemy based on the current number of chips you’ve collected. | Incredibly powerful, though Smelting Green will limit its effects if you get it later. |
| Skill Champ | More emerald ore will appear after defeating an enemy based on the number of skills you’ve unlocked. | N/A |
| Perk Champ | More emerald ore will appear after defeating an enemy based on the number of Emerald Perks you’ve gained. | This is absolutely busted, since you’ll have dozens of perks by the 5th or so round. |
| Goal Champ | More emerald ore will appear after defeating an enemy based on the number of Void Goals you’ve cleared. | Not quite as busted as the above, but still very good, since clearing Void’s goals is basically essential to getting a good start for you run. |
| Healthy Heart | More emerald ore will appear after defeating an enemy while your health is full. | The actual effect isn’t too exciting, but it’s a fine enough choice. |
| Hurtin’ Heart | More emerald ore will appear after defeating an enemy while your health is low. | Theoretically useful, but rather risky. You’d probably prefer to save your Apple Juice, not put it at risk in every fight. |
| Lonely Heart | More emerald ore will appear after defeating an enemy while the Health skill remains locked. | Quite good early on, though you may want to block it once you get the health skill. |
| Happy Heart | More emerald ore will appear after defeating an enemy based on the maximum number of hearts in your health meter. | N/A |
| Ba-None-Za | More emerald ore will appear after defeating an enemy while no Bananza transformations have been unlocked. | A fine choice for the early game, since later difficulty levels start you with zero Bananzas. Best to lock it early on though, since the bonuses for having Bananzas outweigh its usefulness. |
| Elders’ Apprentice | More emerald ore will appear after defeating an enemy based on the number of Bananzas you’ve unlocked. | This is far more practical than the last perk, especially in later rounds. |
| Pristine Primate | For a limited number of time, 500% more emerald ore will appear after defeating an enemy until DK takes damage. | A good choice, especially for skilled players. |
| Brimming Bananergy | More emerald ore will appear after defeating an enemy while your Bananergy is full. | Bonus here is small, but it’s very easy to trigger, so it’s a decent choice. |
| Smashing Forager | More items will appear while smashing terrain. | N/A |
| Bananergy Forager | More items will appear while smashing terrain with full Bananergy. | N/A |
| Apple Hunter | More apples will appear while smashing terrain. | Lock this, you want treasure chests. |
| Chip Hunter | More chips will appear while smashing terrain. | Lock this, you want treasure chests. |
| Treasure Hunter | More treasure chests will appear while smashing terrain. | Choose this, because treasure chests give you a chance to get everything. |
| Green Geysers | More emerald geysers will occur while smashing terrain. | Lock this, you want treasure chests. |
| Emerald Treasure | More emerald geysers will occur while opening treasure chests. | Lock this, you want juice and balloons. |
| Chip Treasure | More chips will appear when opening treasure chests. | Lock this, you want juice and balloons. |
| Apple Treasure | More Apple Juice cans will appear while opening treasure chests. | N/A |
| Melon Treasure | More Melon Juice cans will appear while opening treasure chests. | N/A |
| Balloon Treasure | More Red Balloons will appear while opening treasure chests. | N/A |
| Treasure Trove | More chips and emerald ore will appear when opening treasure chests. | Lock this, you want juice and balloons. |
| Long-Range Forager | More items will appear after smashing terrain by throwing chunks of material. | N/A |
| Superior Smasher | More emerald ore will appear while smashing emerald roots or wooden containers. | Decent early on, but falters later. Block it when it’s outlived its usefulness. |
| Banana Slamma | More emerald ore will appear when you smash a banana. | Like the above perk, it’s great early on, but becomes useless later. |
| Emerald Polisher | More emerald ore will appear when you smash emerald bullion apart. | See above two |
| Turnip Greens | More emerald ore will appear when you pull a turnip out from the ground. | Useful in Forest, Resort and Feast Layers, and it only appears in those places. Block it once you’ve pulled up all the turnips. |
| Magic Wallet | Your total collected chips will be increased by half your current amount. | Useless early on, but later on in the game it becomes incredibly powerful. If you can get this before Smelting Green, you’re probably set for 10 rounds or so. |
| Smelting Green | All collected chips will be transformed into emerald instead. | The most powerful perk in the game bar none. The exchange rate for chips to emeralds is sky-high, so you get anywhere between a few thousand extra emeralds to a few million extra emeralds depending on how much you’ve collected. On lower difficulties this is basically an instant win button, and on higher ones, it’ll basically guarantee you clear the next 3-5 rounds. |
| Chip Thief | More chips will appear after you defeat an enemy. | You get 1 chip per level per enemy defeated. As you can tell, this gets ridiculous fast, and can make Magic Wallet and Smelting Green even better. Use against Peekaboopoids in the Lagoon Layer to just annihilate the mode’s difficulty. |
| Chip Magnet | Automatic emerald collecting will trigger based on the number of chips you’ve collected. | It’s literally free money. |
| Emerald Negotiator | More emerald will be earned after you clear one of Void’s goals. | An incredibly powerful perk in the early to mid-game, but falls off later. Still worth collecting though, since Void Goals are a great way to get money and resources. |
| Chip Negotiator | More chips will be earned after you clear one of Void’s goals. | Also incredibly useful early on, and works well with Magic Wallet and Smelting Green. |
| Hammer Thrower | Increase the range of destruction when throwing a chunk during a Kong Bananza transformation. | N/A |
| Impactful Punches | Increase the range of destruction for Charge Punches. | N/A |
| Rocket Dash | Run at a faster pace during a Charge Dash. | Makes the Zebra much better if you can collect it. |
| Fast Flight | Move through the air faster when you use Glide. | Makes the Ostrich much better if you can collect. |
| Big Eggsplosions | Increase the range of destruction for Egg Bombs. | Fairly useful if you use an Ostrich focused setup, though not optimal for all playstyles. |
| Meteor Rain | Increase the range of destruction for Meteor Punch. | N/A |
| Staring Down | Countdown speed for remaining time will be slowed down during Glare’s slow-motion effect. | Useful if you can get the Snake Bananza, can theoretically double the time available. Whether you want to stay in slow-motion most of the game on the other hand… |
| Barrel Bump-Up | Hold one additional Warp Barrel in your inventory. | Your chances of winning basically depend on if this perk appears early on, since later difficulties start you out with no Warp Barrels and have levels that are nightmarishly difficult to navigate due to their size. Depending on the difficulty chosen, you want to get this perk at least twice. |
| Fossil Radar | All fossil locations can be seen by opening the Map with -. | In theory this is useless. In practice, no one’s likely to have memorised all the fossil locations, so you’ll probably have it to get it at some point anyway. |
What Perks Are Worth Choosing?
Honestly, it depends on your playstyle. Generally, you’ll want at least a few for defeating common enemies (mostly Crockoids and Buzzoids), a few for gradually stacking bonuses (like Turf Groove and Chip Hoarder) and a few for hoarding rare items like Apple Juice, Melon Juice and Red Balloons. Chip Thief is really good too.
Early on you’ll likely want the Fossil Radar and Emerald Negotiator perks, and later on you’ll want Smelting Green to come up as many times as possible.
Are There Any Perks to Avoid?
Generally, anything relating to the Zebra or Snake Bananza is better ignored.
What if I Have No Good Options?
Pick the perk you least hate, then block it next time it comes up. The perks you pick have a tendency to show up more often.
How Do I Gain Multiple Perk Levels at Once?
Smashing a large bunch of bananas with a skill associated with them, or collecting the largest fossil in a level will give you the chance to gain 2-5 levels in the perks that appear.
Generally, we’d recommend waiting until you get the Kong or Elephant Bananza before going after the big fossils though. They’re hard to break out otherwise, especially within the time limit provided on higher difficulties.
Still, that’s every perk in Emerald Rush in Donkey Kong Bananza, and our recommendations for using them. If you follow our advice, you should at least be able to beat the higher difficulty levels on most layers, and get decent ranks on them in the process.
So yeah, we hope it helps you out here! If you need any more help with Emerald Rush or its perks system, leave your comments below, or discuss it over on our Discord server today.